Quickie: Max & Fanny’s Open-Faced Tuna and Fennel Sandwiches (pes)

As if belonging to the YMCA doesn’t make me happy enough, my local Y has started a book exchange program (a well-intentioned, pile, rather) in its lobby. Members donate books they’re done with to the pile and the donated books become fair game for anyone who’s interested. On my way in and out, I stop to scan the boxes and bags and bins of books for new finds. The selection is delightfully varied and makes me love my fellow members even more, quirky smarty pantses that they are. Recently, I made quite the haul when I lifted a few tattered textbooks to find six (SIX!) Peter Mayle books peeking out from underneath the castoffs like rays of Mediterranean sun. “Bring us home!,” they said, “love us and read us and dream of meals in Provence with us!” Um, OKAY GUYS!

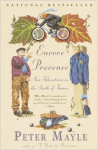
It’s cliché to be an escapist American or Brit who loves to read Peter Mayle, but I’m an American who loves to read Peter Mayle. I really, really do. His books fill the mind with Provençal scents and smells and breezes and dreams of sunny, lazy lunches soaked in wine and olive oil that are much cheaper to read about than to create (faster, too). A Year In Provence and Encore Provence are favorites of mine, as is A Good Year, which Ridley Scott made into a Russell Crowe-starring movie in 2006. Also cliché: women who love Russell Crowe movies. I don’t want to, I try not to, there’s nothing interesting or noble in doing so… but my heart can’t be swayed. He was wonderful in A Good Year, as was lovely Marion Cotillard. Such pretty people in such a pretty setting. Who wouldn’t want to watch that? Speaking of the pretty setting, let’s take a look at the grounds of Château la Canorgue, where the movie was filmed. Le sigh.

So very lovely. A Good Year, both book and movie, are near and dear to me. If you want to make a fast, faux getaway to the south of France, check out A Good Year or A Year In Provence. Here’s my warm-weather recipe inspired by the currently very warm St. Louis weather, the good luck of finding a stack of favorite books, and the hazy, sepia-toned romance of A Good Year. I imagine Max and Fanny serving this in the leafy shade of their terrace on a sunny Provençal day…

tuna 5

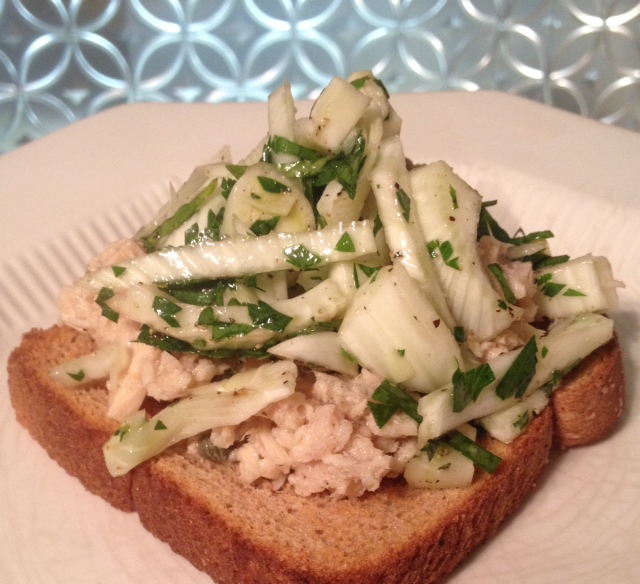
OPEN-FACED TUNA AND FENNEL SANDWICHES

Adapted from Real Simple

Ingredients:

    • 3 6-oz cans of good quality albacore tuna, drained
    • 3 tablespoons capers, chopped
    • 5 tablespoons olive oil, divided
    • 4 teaspoons red wine vinegar
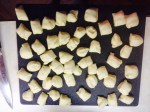
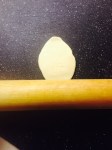
    • 1 medium fennel bulb, sliced into bite-sized pieces
    • 3/4 cup fresh parsley, chopped
    • kosher salt and cracked black pepper
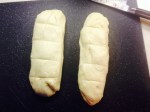
    • wheat toast or sliced baguettes


Directions:

Grab two bowls. In one, mix the drained tuna, the chopped capers, 3 tablespoons olive oil, the vinegar, and about 1/4 tsp black pepper.

In the other bowl, toss the sliced fennel, the chopped parsley, 2 tablespoons olive oil, a large pinch kosher salt and another 1/4 tsp pepper.

Spread a bit of the tuna salad on toast, then top with fennel salad. Grab your loved one and whisper a sweet nothing into his or her ear. Bonus points if you whisper it en français.

fanny and max

“I would like a lifetime spent with an irrational and suspicious goddess, some short-tempered jealousy on the side, and a bottle of wine that tastes like you, a glass that’s never empty.”

I may be getting carried away by Max & Fanny’s love story, but this post is dedicated to my husband and how he makes every day feel like a day in Provence.


Strawberry, Kiwi, and Mint Chop-Chop with Jicama and Roasted Shrimp (gf, pes)

The season is turning, things are heating up outside… This is the time of open windows, attic fans, and late spring breezes. And easy dinners that free up more time to be spent with our loved ones. And salads.

* sweet * tart * mint *

* sweet * tart * mint *

I’m not generally a salad fan but if I can get my hands on one with a high interesting toppings-to-greens ratio (I’m no rabbit), I’m all in and this salad more than fits that profile. Like fruit? Like shrimp? You’re gonna love this…..

STRAWBERRY, KIWI, AND MINT CHOP-CHOP WITH ROASTED SHRIMP

Adapted from Triathlete Magazine

Ingredients:

  • 1 1/2 lb raw jumbo shrimp, peeled and deveined
  • olive oil
  • kosher salt and freshly cracked pepper
  • 1/2 cup jicama
  • 1 pint strawberries, hulled and sliced
  • 4 kiwi, peeled
  • 1 English cucumber, chopped into small dice
  • handful mint, chopped
  • juice of 1 orange
  • juice of 1 lemon
  • 1 tsp honey or agave
  • 1 inch-piece of ginger, grated
  • 1 large container spring mix

Directions:

Peel, devein, and rinse the shrimp. Pat them mostly dry and toss them in a bowl with 1 tbsp olive oil, a pinch of kosher salt, and a few grinds of black pepper. Heat your broiler on high and arrange the shrimp, side by side on a broiler pan, like this:

salad 1

Every time I see tail-on shrimp, I think of Beetlejuice. Every. Time.

Roast the shrimp 2 1/2 minutes, flip, and roast an additional 2 1/2 minutes. They’re going to be perfectly cooked and really tasty. Set aside.

salad 3

Meanwhile (though I suppose not really so meanwhile, as you only have five minutes while the shrimp cook- I apparently have lot of faith in your time management skills), chop all of your fruit and your tuber! That’s right, a tuber. Let’s talk jicama. Jicama is, well, a tuber in the pea family. It’s crispy and refreshing and pairs well with citrus and seafood and salad. So the fruit  and herbs should be chopped as such:

  • strawberries- hulled and sliced
  • kiwi- cut in half, scooped out with a spoon, and sliced into coins
  • jicama- peeled with a vegetable peeler and cut into thick, 1-inch matchsticks
  • English cucumber- cut into small dice
  • Mint- chopped

Chop those and toss. The dressing is easy to make: juice an orange, juice a lemon, add 1 tbsp olive oil, the honey, a pinch of kosher salt, the grated ginger, and a few grinds of black pepper, and stir. Toss the fruit mixture with 1 tbsp of the dressing, then toss your desired amount of greens with another bit of dressing. Layer the greens with the fruit mixture and top with the shrimp. Serve! This would be really good with the addition of feta cheese. Enjoy!

My appetite requires me to eat salad from a mixing bowl... the shame, the SHAME!

My appetite requires me to eat salad from a mixing bowl, don’t judge me


Momofuku’s Pork Buns

Buns. Bao. Pillowy, chewy, savory steamed buns stuffed with decadent pork belly, spicy sriracha, and bright, contrasting cucumber. Chef David Chang, the Korean-American, French-trained creator of legendary New York noodle bar and ramen heaven, Momofuku, rocketed pork buns into their sweet-salty limelight when he added his often imitated version to the Momofuku menu in 2004. Chang’s Momofuku is largely credited for the ramen craze and his signature pork buns have been equally influential.

momo

say this ten times fast in front of your mother

I like David Chang. He’s smart and talented and somehow an “everyman” but incredibly special at the same time. His Instagram makes my mouth water and he designed the Momofuku logo in part as a tribute to Eat a Peach. Which makes him fine by me. There are homages to Chang’s tasty buns (heh, heh, heh) everywhere, even in anti-coastal St. Louis, so the pork bun trend is established and legit. Let’s make some, mmkay?!

If you have time to marinate, roast, and chill the pork and to make the buns, which rise three times, they’re simple. You just need time. Eh, maybe quite a bit of time. Allow for a few hours of rising and prep time for the buns and a possible overnight marinating and chilling of the pork. These are more of an appetizer when made with pork belly since it’s so rich, so you can either be hardcore like the Cruses and eat these as a straight-up meal (I ain’t never scared), substitute a leaner cut of pork, or serve as an app. Glaze and grill tofu or stuff with kimchi and cucumbers for a vegan version.

MOMOFUKU’S PORK BUNS

Adpated from David Chang’s Momofuku Cookbook and Food 52

Makes 25 buns

Vanity Fair on the yin and yang of David Chang: His achievements notwithstanding, he is constantly haunted by feelings that he is out of his depth, even in the kitchen. He ascribes this to han, a uniquely Korean form of angst that manifests itself as both a resigned acceptance that life is difficult and a grim determination to struggle through this difficulty.

Ingredients:

For the pork and quick-pickled cucumbers:

  • 4lbs pork belly
  • 6 tbsp + 1 tbsp sugar
  • 6 tbsp kosher + 1 tsp salt
  • 2 cucumbers, cut into 1/8 inch slices

For the buns:

  • 2 1/8 cup all-purpose flour
  • 2 tsp active dry yeast
  • 3 tbsp sugar
  • 1 1/2 tbsp nonfat dry milk powder
  • 1 1/2 tsp kosher salt
  • 1/4 tsp baking powder, rounded
  • 1/4 tsp baking soda
  • 1/6 cup rendered pork fat, from the pork belly, at room temp
  • canola oil, for brushing
  • hoisin sauce
  • 1 bunch scallions, sliced
  • sriracha, for serving
  • prepared kimchi, for serving

Directions:

For the pork belly: mix the 6 tbsp salt and 6 tbsp sugar and rub all over the pork. Place the pork in a 9 x 13 dish or a roasting pan and cover with plastic wrap; refrigerate for at least 6 hours or overnight. When the pork is cured, pour off any liquid from the baking dish and heat your oven to a blazing 450. Roast the pork for one hour, uncovered, basting halfway through. Lower the oven temp to 250 and roast the pork for an additional 1 hour and 15 minutes. Remove the pork to a plate to cool and pour off some rendered fat to reserve for the bun dough (mmm. pork fat). Wrap with foil or plastic wrap and chill the pork until it’s cool enough to cut- we cooked the pork the day before we made the buns to allow for ample roasting and chilling time, which I highly recommend. Once chilled, the pork will slice and dice nicely. When you’re ready to eat, slice the pork into 2″ x 1/2″ slices and warm in a pan on the stove or microwave.

ch-ch-changes

ch-ch-changes

For the cucumbers: slice the cucumbers into 1/8″ thick rounds. I decoratively peeled mine with a zester because I’m fancy. Toss with 1 tbsp sugar and 1 tsp kosher salt. Let sit for 10 minutes, then cover and refrigerate until ready to use. So easy! Look at you, you’ve pickled something! So capable, you are.

For the buns: Add the yeast and 3/4 cup warm water to a the bowl of a stand mixer fitted with a dough hook. Add the flour, sugar, dry milk powder, salt, baking powder, baking soda, and rendered fat. Turn the mixer on its lowest setting (I used “stir”) and let dough mix for 8 minutes, until it climbs the hook and forms a ball. Lightly oil a large mixing bowl and plop the dough ball in it; cover with plastic wrap and place in a warm area to rise until doubled in size. What with it finally feeling like summer, feel free to place the bowl on a windowsill for extra cozy home points.

When the dough has doubled, punch it down with the back of your hand to expel most of the air. On a clean surface- I always use a large cutting board to work with dough, makes cleanup easier- form the dough into a ball or log. Divide into 5 equal pieces and roll those into logs. Cut each logs into 5 pieces the size of ping-pong balls. Use your knife to mark off the cutting areas before you slice. I made a double batch of dough, so these are double-batch photos:

Roll the ping pongs of dough into balls and place onto a baking sheet. Cover the sheet loosely with plastic wrap and allow the balls to rise 30 minutes. While these are rising, cut out 25 4″ squares of parchment paper to steam the buns on and slice the scallions. Refrigerate sliced scallions until ready to use.

When 30 minutes has passed and the balls of dough have puffed up a bit, use a rolling pin to roll each ball into a 4″ oval. Brush each oval lightly with oil, place on a square of parchment paper, and fold in half by folding a bun over itself onto a chopstick and sliding the chopstick out. Guess what? They have to rise again. PLace the squares of parchment back on the baking sheet or maybe across a counter, making sure not to let the buns touch. Cover with plastic wrap and allow to rise 30-45 more minutes. You’re almost there! We’re almost steaming!

And now…. we steam! Which means we eat soon! Set up a bamboo steamer (or other flat steamer) on a wok or over a large saucepan filled with about an inch of water, and bring the water to a boil. Place a few buns, parchment paper included, on the steamer, making sure not to overcrowd or allow the dough to touch. Cover and steam for 10 minutes per batch, removing buns to a platter as you go.

If you haven’t done so already, slice and heat the pork belly. Stuff 2-3 pieces of pork belly into each bun, topping with cucumbers, scallions, and 1 tsp hoisin sauce. Pass kimchi and sriracha and revel in your trendy culinary accomplishment!