Love, Knoxville: Rev3 Triathlon & Tupelo Honey Cafe

Last weekend was heavenly. I took a solo roadtrip (complete with eight-hour, one-woman karaoke sesh), I got to race in a beautiful part of the country, and I got to see my sisters, brothers-in-law, and magnificent niece and nephew. I did the things I love the most with many of the people I love the most. The only conceivable improvement would have been having Dave there with me, but that might have caused me to explode with happiness… I am thankful for the weekend with my family and am much more content undetonated.knox20My baby sis lives in Knoxville, Tennessee, which has become one of my favorite places to visit since she moved there in 2005. Knoxville is a charming, deliciously Southern city on the Tennessee River and its people are as lovely as its scenery (read: quite). Said lovely people are polite and gracious and their local food is fantastic (they have a biscuit festival- a biscuit festivaaaal), so even if I hadn’t had a super fun race planned, I was delighted to be spending time in tasty, sunny, welcoming Knox.

The race that brought me in, the Rev3 triathlon, is held in World’s Fair Park and was a three-pronged race this year. There was a 70.3 distance, an Olympic, and a hybrid Championship distance for athletes who qualified at various Rev3 events throughout the season. 2014 marked the last year Rev3 would host a professional race with a prize purse- controversy! They’re trying out a new age group-based model that eliminated the pro race entirely. I’ll miss the excitement of watching the pros and it’ll be interesting to see how the races change with the offer of money for age-groupers. Will lower-tier pros race as age groupers? Who’s going to come out of the woodwork now that there’s money on the table? Will participation grow or shrink? Will this raise the likelihood of doping among age-groupers? How will testing work and will it be more frequent? So many nerdy triathlon questions, aagghhhh!!

https://i0.wp.com/i.imgur.com/L3wKyem.gif

Anyway, I raced the Olympic Aquabike, a funky little combination that not a lot of people participate in- it’s just a .9 mile swim and a 24 mile bike. No run. My right knee is the devil, so swimming and cycling are much more fun for me. It was a perfect combo- I was able to compete and get a great workout without collapsing for the rest of the day. The swim was in the Tennessee River, upstream for about 1/3 of a mile from the dock at Calhoun’s, then downstream the rest of the way. Water temp was 68- a little chilly when you jumped in but not bad at all as long as you had a westuit.

The bike was super hilly- rollers and a few long climbs. Living in the Midwest, I have to seek out hills to ride. The lush, green, winding Knoxville back roads were very different from the pancake-flat Missouri and Illinois trails with ancient, time and iceberg-worn Ozark “hills” I’m used to, so the change was challenging and welcome.

Other than a girl in front of me almost getting hit by a car going uphill around a bend (yeesh) and seeing a pack of guys drafting (lame-o, blame-o), the ride was perfect. Breathtaking, well-supported, and realllly fun.

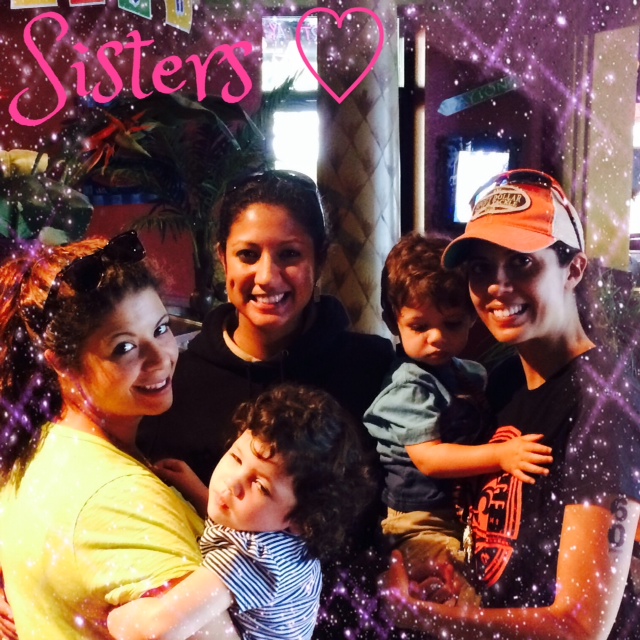
My sisters came out early in the morning to support me in my weird hobby (amazing. they’re amazing) and brought the kiddos. I even lucked out and took home some swag. And that was the race! Thanks, Rev3, for another great event and thank you, sisters, for being so very loving and wonderful and encouraging.

knox1

love those sissies

For anyone traveling to Knoxville for the Rev3 in the future, I highly recommend Tomato Head for an awesome pre-race meal. Tomato Head serves up pizza for every taste, from vegan to chicken with pesto and walnuts to Margherita. By the slice, too, all crazy kinds. It’s incredibly family-friendly and has a top-notch local beer list, to boot.

the kiddos cracking wise at Tomato Head

the kiddos cracking wise at Tomato Head

Post-race included a trip to another Knoxville fave, Stir-Fry, for pad Thai and sushi and hot and sour soup (why else would I race?! for the food, the FOOD!!). But the kicker was breakfast the next day…. Tupelo Honey Cafe.

knox19

come on in, y’all

Tupelo Honey Cafe was my last hurrah before hitting the road back to MO. Diana and I grabbed an early breakfast there on a green, rainy morning. The restaurant has several locations, all in the South; Knoxville’s is on Market Square, the heart of downtown.The atmosphere was great- the place is basically a pinner’s dream come true- open kitchens, blue glass bottle chandelier, or hanging reclaimed window dividers, anyone?

We each ordered the quiche-like “breakfast pie,” she the vegetarian, with asparagus and herbs, and I the omnivore, with ham, red peppers, and Brie. Each pie was topped with an edible flower. Come ON with the cuteness, woudja? Geez, Tupelo Honey Cafe! It’s like you’re reading my mind!

knox17
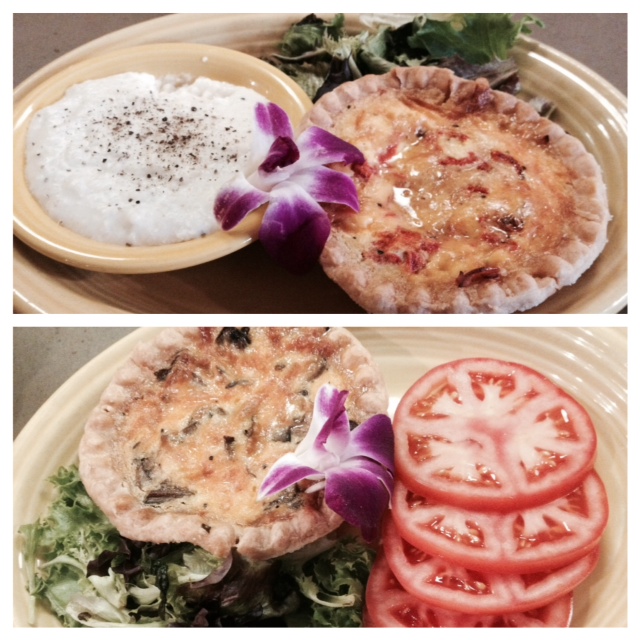
The crusts on the pies were perfectly buttery and flaky. Diana ordered sliced tomatoes on the side (the South is getting to her) and I had luscious, tart, creamy goat cheese grits. Say whaaa? Total elevation of goat cheese. And of grits. Continuing the elevated dairy trend, we also ordered whipped peach butter- butter whipped with chunks of fresh peaches (you probably guessed that, eh?). The peach butter melted over the complimentary biscuits we drizzled with house-branded honey. Basically, I was carbed and caloried-up for another race when I hit the road.

...as sweet as Tupelo honey/just like honey from the bee

…as sweet as Tupelo honey/just like honey from the bee..

If you have the chance to stop by Tupelo Honey Cafe, and you like happiness and good things, do. There’s just something about well-made Southern food that warms the spirit (even if the restaurant has more than one location). Your spirit will be warmed. Mine was- all over Knoxville, in fact. Another amazing trip for the [cook]books.

sisters

so much love/niecey is over it


Baguettes! (v)

At the top of the rustic, earthy, lovely food to eat and make list- baguettes!

bags crispy

On the yeasty, satisfying, work with your hands list- baguettes!

bag and butter

Put on your berets and Breton striped shirts– let’s make baguettes!

THREE BEAUTIFUL BAGUETTES

Adapated from Food52

Ingredients:

  • 3 1/4 cups all-purpose flourbag ingreds
  • 1 1/2 cups hot water
  • 1 tsp active dry yeast
  • 2 tsp kosher salt
  • 1 /2 tbsp canola oil
  • 1/2 cup ice cubes
  • You will also need parchment paper, two kitchen towels, a rimmed baking sheet, a pair of scissors, and a cast iron or other oven-safe skillet

Directions:

This recipe is very simple. If you can knead dough (you can, the ability is buried in your genetic code) or have a stand mixer to knead dough for you, you can make these beautiful baguettes. There’s a lot of waiting involved as the dough rises; hands-on time is minimal. Baking these lovely parcels of dough is a rewarding, foolproof venture. Let’s get to it.

Faisons baguettes!

Faisons baguettes!

In a large bowl or your stand mixer’s bowl, whisk the hot water into the yeast. Let it sit for ten minutes, until foamy.

bag yeast water

When ten minutes has passed, mix the flour into the yeast and water with a fork, until a shaggy dough forms. I did this in four pour of flour for even mixing. Let this sit for 20  to allow the flour to hydrate. You’re getting the hang of this waiting stuff by now, aren’t you? Good. There’s more to come.

bag dough shaggy

After 20 minutes, add the kosher salt. Attach the bowl to the stand mixer and knead with the hook attachment for 4-5 minutes on speed 2, until the dough has climbed up the hook and is smooth and elastic. Alternatively, knead the old-fashioned way: turn dough out onto a lightly floured surface and knead for 10 minutes with the heels of your hands. “A good knead is better than an hour of psychotherapy, and it’s free.” There’s your motivation. Exorcise the demons.

bag dough salted

When your dough is smooth and shiny and elastic, oil a large glass bowl with the half tablespoon of canola. Pat the dough into a ball and place it in the bowl; cover with plastic wrap and let rise in an oven or microwave until doubled in size, about 45 minutes to an hour.

smooooth.

smooooth.

Once doubled, remove the dough and turn it out onto a lightly floured surface. Shape it into a 6×8 inch rectangle, then fold the long sides into the middle, followed by the short sides. Basically, double fold it into a little bundle. Pop the bundle back into the oiled bowl and let double again, another 45 minutes or so. I hope you have a good book to read, what with all of this sitting around, sheesh. Consider this AbeBooks list of food memoirs if you don’t. Just looking at the covers makes me hunger for a memoir marathon… I’ll need a rainy Sunday, a cozy blanket, and a LOT of supplemental food.

bag dough folded

Now we get to play with the dough! Turn the lovely bundle onto a very lightly floured surface and pinch off into three equally sized sections of dough. Roll and pinch the rounds into 14-inch logs; these will be the base shapes for your loaves.

bag dough three

Grab your rimmed baking sheet and flip it over. Arrange a piece of parchment paper 3 inches wider than the sheet and fold two pleats into it. Lightly flour the pleated parchment paper.

bag pleated parchment

Put the loaves in the spaces you’ve created on the parchment paper and pull them close together- we’re using the pleated paper to allow the loaves to rise up, not out. Roll the two kitchen towels up and place them on either side of the three loaves. Let the loaves rise until doubled. LAST TIME, I promise.

bag dough towels final

Place the cast iron skillet on the very bottom rack of your oven. Arrange a rack right above that and preheat the oven to a blazing hot 475. To make the baguettes look like baguettes, cut slices into the tops of the dough at 30 degree angles with your scissors (add that to your baking bag of tricks!). Very pretty. Flatten out the parchment paper and pop the baking sheet, still inverted, into the oven. Immediately add the 1/2 cup of ice cubes to the cast iron skillet and close the oven door. The ice cubes will sizzle away and release steam, producing a crisp crust. Bake for 20 minutes, until a deep brown. Let cool and serve! They will be crispy on the outside and chewy on the inside. Slather with butter and kick back. Bon appétit.

bags complete cooling


Focaccia! Deep-dish Focaccia! (v)

image

Dave and I were fortunate enough to visit the most beautiful place in the world recently: the U.S. Virgin Island of St. John. The island is 2/3 national park (whaaa!), has beaches varying from pristine white sand with aquamarine water to grassy turtle habitat to all smooth, gray rock,  it’s dotted with Dutch and Danish sugar mill ruins, and it’s crisscrossed with challenging and well-maintained hiking trails. The fact that the majority of the island is a park keeps the riff raff out (airports, huge all-inclusive resorts, restaurant chains, shopping malls) and that’s helped the wildlife, flora, coral, and sea life stay healthy and breathtaking. It’s pretty much the real-life Neverland. I know this because the people of St. John each have a glinting glimmer of Lost Boy in their eyes.

Neverland, I tell ya

Neverland, I tell ya

We fell in love the moment we arrived and swam, hiked, and ran over as much of the island as we could during our stay. We snorkeled daily, swimming with hawksbill turtles, myriad tropical fish by the school full, barracuda, rays, and even a large eagle ray. Rarely have I come back from a vacation in better shape than I left, but that was definitely the case coming home from St. John. And while the scrubby Missouri hills of home can’t compare to the vertical, emerald green volcanic mountains of STJ, I am determined to forge a hiking habit this summer, ticks be damned. Each day after hiking and swimming, we’d head to better-than-they-have-to-be food and drink spots like the Fatty Crab (order the Recession Special), Sam & Jack’s, Vie’s Snack Shack for conch fritters, Skinny Legs for burgers, live music, and shots with locals, and Asolare (go straight to the bar to meet Kim, master mixologist). I’m telling you, if you’re an outdoorsy nature lover who also enjoys outstanding and creative food, people, and drink, St. John may very well be the island for you. It certainly stole our hearts.

Outside of physical exertion and rum-swilling good times, a highlight of our trip was an incredibly romantic dinner Dave booked with Ted’s Supper Club, a well-known private chef service  on the island. We were agog watching Ted cook. A-freaking-GOG. The skilled and professional Chef Ted whipped up an unforgettable meal of salad, dumplings, scallops, fish, veggies, lava cake, and a deep-dish focaccia bread with pesto and tomatoes cooked in cast iron that held us over for days. The focaccia really made an impression on us and I vowed to make it when we got home. That was in January; we have refined our humble approximation over three tries since. I present to you: Lauren and Dave’s deep-dish St. Louis focaccia by way of Chef Ted of St. John. Hearty. Delicious. Bring a hunk on a hike.

image

DEEP-DISH FOCACCIA

Humbly and reverently adapted from Ted’s Supper Club and Italian Food Forever

Ingredients:

  • 5 cups all-purpose flour, plus more for dusting
  • 2 tbsp (3 packets) instant yeast
  • 1 tsp kosher salt
  • 1 Italian seasoning
  • 2 cups warm water
  • 2 tbsp pesto
  • 2 tbsp chopped sun-dried tomatoes
  • 4 tbsp olive oil, divided
  • Parmesan cheese, optional (recipe is vegan without)

Directions:

Note: I let this bread rise three times, so go into this knowing that it’s is a time-consuming recipe, even with the speed-rise method I recommend.  Mostly hands-off time, but still. In a large mixing bowl, blend the flour, salt, Italian seasoning, 2 tablespoons olive oil, and yeast. Add 1 cup of warm water and stir until combined. Add the remaining cup water, 1 tablespoon pesto, and sun-dried tomatoes. Stir the rest of this in well until the mixture resembles a shaggy ball. This takes a bit of manhandling and you could take care of this step in a Kitchenaid with the hook attachment if you’d like.

I was lazy and didn't take a picture of this step. Shame, shame! Enjoy this map of Neverland instead.

I was lazy and didn’t take a picture of this step. Shame, shame! Enjoy this map of Neverland instead (available on etsy).

Turn the dough out onto a lightly floured counter or prep board and knead for about five minutes, until the dough is smooth and uniform. You may want to have your hunky husband take care of this step as you watch him admiringly from the other side of the kitchen, what with his being all rustic and manly and kneading the dough and all. Shape the dough into a ball. You’ll be very happy with how pretty it looks at this point. I’m happy for you, too. Ted would keep a small chunk of dough from his most recent focaccia as a starter, which we have begun to do as well. This helps the dough develop a yeasty, sourdough flavor, so tear off a hunk and refrigerate for your next batch if you plan to do the same. In a large, clean, glass mixing bowl, add 1 tbsp of the olive oil and place your dough in the bowl, turning to cover with oil. Cover the bowl with plastic wrap or a kitchen towel and set aside.

image

Now, for the rising process: I use a rapid-rise method for this bread, and it works wonderfully. Place a measuring cup (I use the same glass measuring cup I measured the water with) and microwave for about a minute thirty, until hot. Leave the cup in the microwave, and place your covered dough bowl in next to it. Close the microwave and let the dough rise until doubled, about 20-30 minutes. Keep an eye on this- take a picture on your phone for reference if you want to compare size. After the dough has risen, punch it down with the backs of your hands until the built-up gas has been released, then fold over itself, coating with the oil in the bowl, and cover again with the plastic wrap (I had to reach out to an expert baker friend from high school on this step via Facebook; I ❤ social networking). Let the dough rise a second time, punch down a second time, and let the dough rise a third and final time. Whew. This will take an hour to an hour and a half total. You will be handsomely rewarded for your patience, I promise.

image

doubling

Now! Preheat your oven to 425. Add 1 tablespoon olive oil to a cast iron pan, coating the bottom and sides. Remove the dough bowl from the microwave, punching down the dough a final time. Spread the dough out evenly in the pan with your fingers. Don’t you feel homey and capable? You should. Poke a few holes in the top of the dough, spread the top with the remaining 1 tablespoon pesto, and sprinkle with Parmesan, if you’d like. image

Bake for 25 minutes on the middle rack of your oven, turning once. THIS STUFF IS DELICIOUS. We cut it into squares because we eat too much at a time otherwise but slices work, too. Top with a mix of hearty vegetables, or serve with marinara, meat sauce, or soup. Or just eat it plain and dream of the islands as you enjoy your lovely creation by the fistful. Così buono!


Stand Mixer Buttermilk Biscuits, or Ode to the KitchenAid, or Today, I Am A Woman

For Christmas, my thoughtful and generous mother-in-law gifted us the loveliest KitchenAid stand mixer in a retro mint green hue. It is a truly beautiful piece of equipment and an object of design perfection. Opening our new mixer felt like a rite of passage into True Womanhood. Just owning the thing makes me feel like a domestic goddess and I’m pretty sure it’s made me a better wife. Ha!

image

In my slightly melodramatic, tradition-loving eyes, when one comes to own a KitchenAid, one is inducted into a time-honored order of serious home cooks and bakers. I really feel the blessings of a million lovingly-made birthday cakes and doting grandmothers enveloping my kitchen, and I love them all.

I'm now one degree of separation away from Julia Child. here's her mixer at the National Museum of American History

I’m now one degree of separation away from Julia Child, right? here’s her mixer at the National Museum of American History.

It’s no small surprise that after gazing longingly at the mixer for a few weeks during an especially busy holiday season, as it radiated the mint green glow of graceful experience from its shelf, I launched myself into a series of attempts to make Womanly Things with it. Yesterday’s crack at gender inequality yielded some of the softest, most buttery and delicious biscuits I’ve ever tasted… and I’d made them. WHOA. My gain is your gain! Behold….. buttermilk biscuits!

butter me up

STAND MIXER BUTTERMILK BISCUITS

Adapted from Broma Bakery

Ingredients:

  • 2 cups all-purpose flour, plus more for dusting
  • 2 tsp sugar
  • 1 tbsp baking powder
  • 1 tsp kosher salt
  • 1 stick butter, chilled and cut into squares
  • 3/4 cup buttermilk

Directions:

Set up your stand mixer. Dust off the top. Pat it affectionately. Pre-heat your oven to 425 and grease a baking sheet. Add the flour, sugar, salt, and baking powder to the bowl and mix at medium speed (I used setting 4) with the whisk attachment. With the whisk attachment still in use and the motor running, add butter squares and allow to mix until the crumbs resemble cornmeal. This will take 3-5 minutes, so be patient- it’s still faster than cutting in butter with a pastry cutter and will be much more even.

Butter should mix in like this

Butter should mix in like this

Switch out the whisk for the dough hook attachment and turn speed back up to medium. In three additions, pour in the buttermilk, allowing the dough to absorb it between each pour. Let the dough hook mix it all up until the dough hangs on the hook in a ball, about another minute. Don’t over mix.

dough on hook

dough on hook

Lightly flour your hands, a rolling pin, and your rolling surface and plop the dough down. I really dislike the thought of rolling food out on a counter, so I use a flat, heavy, oversized cutting board for working and rolling dough. So there’s that. Pat the dough into a rough ball and begin rolling out in all directions, keeping the rolled surface level. I rolled my biscuits out to a 1/2 inch, but feel free to roll to a 3/4 inch or 1 inch height for taller biscuits, you showy thing, you. Cut out using a biscuit cutter or, as suggested in the original recipe, the top of a cocktail shaker! That worked perfectly for me- who knew?!

two uses- fabulous!

two uses- fabulous!

image

Cut all of the biscuits you can, and re-roll the dough, re-cutting as needed. This recipe yielded eleven biscuits for me, all of which were eaten same-day. Place the biscuits on your prepped baking sheet or, alternatively, in a cake pan or cast iron skillet for fluffy, pull-apart edges. Bake for 15 minutes, turning the baking sheet once. Voila! You’ve rocketed into the floury stratosphere of People Who Can Make Biscuits! Next time, I’m adding more sugar and using for strawberry-rhubarb shortcakes… stay tuned!

who had the best helpers in the world?! scissors, spoon, and all.

who had the best helpers in the world?! scissors, spoon, and all.


Quickie: Hard Boiled Eggs with Dukkah (veg, gf)

As I mentioned in my last post, I’m in love with the Heidi Swanson cookbook, Super Natural Every Day. This lovely little snack is straight from her book, with a Trader Joe’s-loving twist: I bought my dukkah pre-made. Sacrilege, I know! And while Heidi’s recipe for homemade dukkah is lovely, I couldn’t pass up a high-quality shortcut for $2.99.

eggs

Dukkah is an Egyptian seasoning blend made of nuts and spices, and is often mixed with oil and used as a delicioud bread dip. Heidi suggests drizzling a hard-boiled egg with a bit of olive oil and sprinkling with dukkah as a quick and flavorful snack.

dukkah

This idea has been tantalizing me for months and when I found my jar of dukkah at TJ’s, it was game on. This is much less a recipe than an idea and an inviting way to try a possibly unfamiliar spice blend. So, let’s talk hard boiled eggs and have a snack, shall we?

HARD BOILED EGGS WITH DUKKAH

Inspired by Heidi Swanson

  • pre-made dukkah, available at Trader Joe’s, or made with Heidi Swanson’s recipe
  • eggs
  • olive oil

My foolproof method for hard-boiling eggs is this: place your eggs gently into a pot and cover with cold water, bring to a boil, cover with a lid and remove from heat, allow to sit- covered- for 15 minutes. When 15 minutes is up, float the eggs in a bowl of ice water before peeling. This will prevent those icky green rings around the yolks. Peel, cut an egg in half lengthwise, drizzle with a bit of oil and sprinkle with dukkah. Delicious!

ice bath


Phototastic Travel Post: Mangú (Dominican Mashed Plantains) (v, gf)

In October of last year, Dave and I traveled to Santo Domingo for a few days to see my amazing cousin Michelle marry the love of her life, Arturo. Stick with me here- I’ll get to food, I promise. The wedding was beautiful and we were treated like royalty by my beloved aunt, who I call Tata. Staying with Tata is unlike staying in a hotel- not only are the food and surroundings better, everything she touches is filled with unconditional love, in the way only Tata can do.

Tata's impeccable mangú

Tata’s impeccable mangú breakfast

Dominican hospitality is like nothing I’ve experienced anywhere else- friends and family members greet their company with freshly squeezed tropical fruit juices, presented on silver coasters and handmade lace doilies. There is no pointing to the cabinet of glasses, no “help yourself,” the way there is in the Cruse household (sorry, Tata). The details Dominican hostesses remember about their guests are uncanny and never forgotten- my husband, who loves desserts, was bombarded with cake and ice cream the last time we were down after only being rumored [online and a thousand miles away] to be a dessert fiend. Which is a spot-on assessment. Tata remembered from years ago that I like brown sugar more than white, and lovingly made me strong, Dominican coffee each morning with a beautiful little bowl of brown sugar next to it. Dave likes tea more than coffee, and Tata graciously made it for him each morning, served on a small silver, doily-covered tray next to my coffee. If I am someday as effortlessly gracious a hostess as Tata is, I’ll be forever happy:

coffee

One of my favorite Dominican breakfast dishes, mangú, is part of the classic, hearty, Dominican farmer’s breakfast that also includes fried cheese or salami, avocado,  and sunny-side up eggs. It’s heavy, but man… it’s GOOD.

After watching Tata make mangú a few times and finding an international grocery store in Saint Louis that sells green plantains, I started making it at home. Plantains are a nutrient-dense, starchy food that look like bananas but aren’t sweet (though they can be, if ripe, and when prepared other ways). They’re comparable to a very tasty potato, so don’t be misled by their banana-like shape. When not paired with salami or cheese, this is a very healthy breakfast dish.

MANGU

Ingredients:

  •  2-3 green plantains, unripe, peeled and cut into chunks
  • salt
  • olive oil
  • 1 clove garlic, halved
  • 1 tbsp white vinegar
  • a few rings of red onion, sliced
  • boiling, salted water, 1 cup reserved
  • avocado, sliced (optional)

Directions:

The easiest way to peel and chop the plantains, I find, is to cut slits down the sides of the peel lengthwise, and remove the peel from the ends. You may want to wet your hands while peeling if you don’t like starchy digits. Cut the plantains into chunks and toss them, along with the garlic clove, into the boiling, salted water. Boil until very tender, about 20 minutes.

Meanwhile, heat the vinegar in a small saucepan and add the red onion, cooking until fragrant and tender. These are a traditional mangú topping, but are optional. But, come on, you’ve already purchased unripe plantains from your local international grocery store, you may as well go whole-hog…

cooking, cooking away

cooking, cooking away

When they’re very tender, remove  the plantains and garlic to a large mixing bowl and add 1/4 cup of the cooking liquid, 2 tbsp olive oil, and the teaspoon of kosher salt. Mash!! You can do this with a potato masher or a fork- I prefer a fork. If you’d like, you could also toss the mixture into your food processor in lieu of mashing. Now, here’s where your chef’s intuition comes in- depending on the size of the plantains you used and the consistency you like, add more cooking liquid by the 1/4 cup and olive oil by the tablespoon. I add a few more tablespoons of water and 1-2 more of olive oil. Taste as you go. You’ll notice that Tata’s mangu was thicker than mine- it’s all about preference.

And your taste-testing abilities will now be rewarded…. YOU MAY EAT!! Put the mangú in a serving bowl, top with onions (strained from vinegar) and serve! I really enjoy this dish with sliced avocado and a fried egg on top. Makes a great and complete breakfast or lunch. Just don’t take it personally when you get the side-eyes from your coworkers as they eat their canned soup.

this earned me a few confused lunchtime stares

this earned me more than a few confused lunchtime stares

If you’re reading this on a wintry, January day, which is the kind of day I’m writing on, enjoy these photos of Tata’s kitchen and amazing tropical produce and some shots of the city… ah, the comforts of home-away-from home:

view of  Zona Colonial as you leave the city

view of Zona Colonial as you leave the city

DADS HOUSE

the row home where my Dad grew up

cocina dominicana 1 cocina dominicana 2


Whole Wheat Pumpkin Pancakes with Chopped Almond Syrup (Best. Weekend. EVER., pt. deux) (v)

The morning before I made the  delicious migas, we worked up big appetites with a nice long swim at the Y, which consisted a slow and steady swim for me, with glimpses out of the corner of my goggles of Dave passing me back and forth for a solid hour, like something out of shark week. He was going so fast, I thought he was going to swim up and body slam me or thrown me in the air like an orca with a baby seal. Didn’t happen (WHEW… chalk one up for team seal).

ermahgerd

Anyway, we swam a lot and were hongray when we got back. What to make? Uh, how about every breakfast item we could name? There was a “you bought healthy bacon?” debacle recently (grounds, so the menu definitely included full-fat, old-school bacon, scrambled eggs, and biscuits along with the pumpkin pancakes (which are pretty healthy). Here’s what I came up with, and this recipe includes a basic homemade pancake mix you can keep on hand*:

WHOLE WHEAT PUMPKIN PANCAKES WITH CHOPPED ALMOND SYRUP

Ingredients:

  • 1 recipe whole wheat oatmeal pancake mix: 1 cup whole wheat flour, 1 cup ground oatmeal, 1 tbsp baking powder, 1 tsp salt, 1 tsp cinnamon
  • 1 egg
  • 1/2 can Libby’s pumpkin
  • 1 1/2 tsp pumpkin pie spice
  • 1 cup soy or skim milk
  • 1 tbsp brown sugar
  • 1 cup sugar-free syrup
  • 1/2 cup chopped almonds
  • canola oil

Directions:

Mix everything in a bowl. Woo hoo! Easy peasy. Everything except canola oil, of course, but you didn’t do that, did you? You knew better. I knew you would! Add milk in third-cup increments, blending well each time.

first side…

Heat a nonstick skillet just under medium heat and add 1 tbsp canola oil per batch of pancakes. These do best when the batter’s a bit thin and the skillet is hot- the pumpkin is so dense it impedes the cooking process with a lower heat or thicker batter. Using a 1/3 c measuring cup as your guide, scoop three servings of batter into the hot pan. Cook for 1-2 minutes on the first side, or until bubbles form in the batter and the edges appear set. Flip and cook the other side another 2 minutes, then remove to a paper-towel lined plate.

flipped!

Pour the syrup of your choice and the chopped almonds into a microwave-safe creamer or small pitcher for serving. Microwave for 45 seconds and serve with the pancakes. These are mm-mm good, especially with real bacon.

*First, a note on the pancake mix. I keep this pre-mixed in a canister at home, about 4 batches worth. It’s really great to have on the weekends. To make pancakes from the dry mix recipe above (which was inspired by this FitSugar recipe), scoop 1-2 cups mix into a bowl, add an egg, 1 tablespoon of something sweet (honey’s a good option), and a cup of milk or more, depending on your taste. Some variations we’ve enjoyed: replace part of the mix with a scoop of vanilla protein powder, add berries, peanut butter, nuts, strawberries, or bananas. Good stuff!


Vegetarian Migas & The Best Weekend. EVER. (veg, gf)

This is the first in a flurry of recipes I’ll be posting from the Best Weekend Ever. Somehow, the planets aligned and Dave and I had not only a banking holiday tacked on to our weekend, but we had no plans to leave town. And we had no guests coming in. And we had no solo obligations. And the only things we did have on the books were FUN. And both of us were home. And the weather Saturday was insanely pretty. And we got to eat a lot. While this might sound boring, and while we do love our out-of-town loved ones and house guests, this kind of Dave-and-Lauren long weekend never happens. It’s been months or maybe a year since we had time like that with each other that we didn’t enjoy a plane ride away (stressful in itself). And even then it wasn’t just the two of us. This weekend was like a second honeymoon!

We swam, got a bike ride in (on The Windiest Day Ever), saw the new James Bond- two thumbs up, went bowling, went to dinner with friends twice, went for a long walk around our neighborhood, watched movies and took naps every single day. And I furiously cooked my way through the whole thing. For every calorie burned on the bike or in the pool, I’m pretty sure I cooked two to replace it as soon as we got home. But I probably burned half of those off from intense and loving, Pepe Le Pew-style smiling.

le sigh

I made my sweet potato and black bean burritos on Saturday night, and we headed to Illinois to ride on Sunday morning. My ride was shorter and I beat Dave home; I wanted to make a hearty and healthy brunch for when he got back, and I thought the quickest way to do this was to combine the leftovers from saturday and a dish we love- migas. The migas we order in the Midwest are a Tex-Mex version of a Spanish dish. Scrambled eggs, strips of fried corn tortillas, tomatoes, chorizo, chile peppers, onion, and cheese. I health-ed this up a bit (surprise!!) by starting with the veggie and bean mixture and by baking the tortillas.

SWEET POTATO AND BLACK BEAN MIGAS

Ingredients:

  • half recipe sweet potato and black bean burrito filling, AG! recipe found here
  • two corn tortillas, cut into 1-inch pieces
  •  1 tbsp + 1 tsp olive oil
  • 6 eggs, beaten with: 1/4 cup milk and 1/2 tsp kosher salt
  • 1/2 bunch scallion, sliced
  • 2 tbsp cilantro, chopped 
  • 1/2 avocado, sliced
  • salsas, cheeses, sour cream for serving

Directions:

Heat your oven to 350 and spread the remaining teaspoon of olive oil on a foil-lined baking sheet. Cut the tortillas into one-inch pieces and spread onto the oiled baking sheet. Pop these into the oven for 5-7 minutes be sure to check them 5 minutes into cooking. When they’re slightly browned and crispy, remove them from the oven. We’ve been hooked on Mission’s Artisan whole wheat and corn blend tortillas– they have the earthy taste of corn and the addition of wheat makes them pliable. Best of both worlds!

Meanwhile, in a large, deep skillet (preferably cast iron), heat the tablespoon of olive oil. Add the sweet potato and black bean mixture, and cook over medium for about 5 minutes, until heated through and browned more than it was when you put it in the pan. Add the crispy tortillas at this point, and cook for another 3 minutes.

Crack the eggs into a bowl and whisk with the milk and kosher salt. Pour the eggs over the veggies and tortillas and lower heat, stirring the mixture frequently. The eggs will cook quickly! Once they’re set, top with cilantro and scallions and serve with avocado and salsas. Kiss your significant other. Ta-da! Brunch is served!