
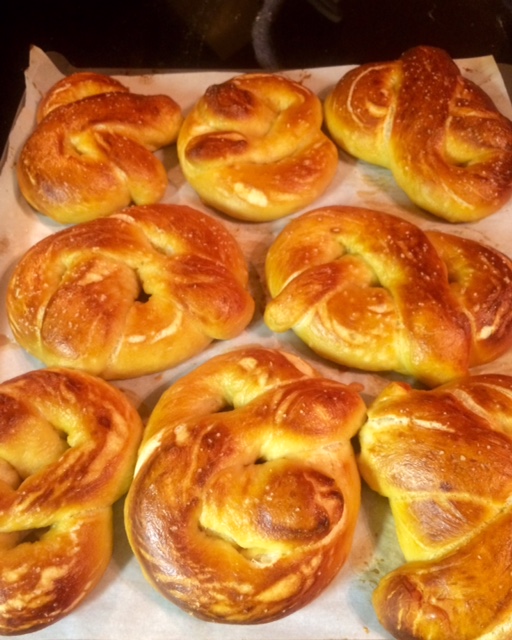
 You’ll be as surprised as I was to learn how easy pretzels are to make (very). Mix, rise, shape, boil, bake. EAT. How about I link to the foolproof recipe I used and let the clever and precise Alton Brown explain? Sound good? Good.
Snack Du Jour: goop’s Chai Gingerbread Detox Shake (gf, veg)
A genius post-Thanksgiving damage control shake in a facepalm seasonal flavor combo.
Adapted from goop, herself.

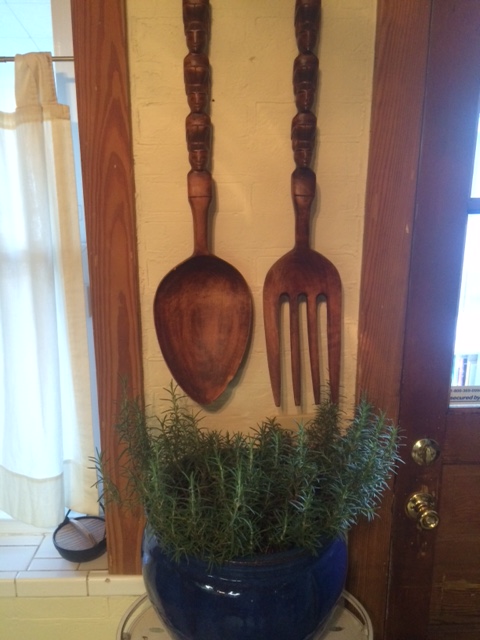
sneaking in my pot of rosemary as a backdrop
CHAI GINGERBREAD DETOX SHAKE
Ingredients:
- 1 tsp cinnamon
- 1/2 tsp allspice
- 2 tsp ground ginger
- 2 tbsp almond butter
- 1-2 small scoops vanilla whey protein, optional
- 2 cups hot, brewed chai rooibos tea OR 1 cup brewed tea if not using protein
- 1/2 cup almond milk if not using protein
Mix dry ingredients in a blender bottle. Shake them up. Add the hot tea and almond butter and shake again. Add almond milk, if using, and shake again. Et voilà. Since I’m so proud of my rosemary, which survived an entire season in my care, please enjoy this gratuitous photo:
HAVE A VERY HAPPY THANKSGIVING!
Quickie: My New Favorite Baked Potato (gf, veg)
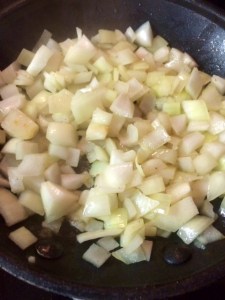
Perpetual baked potato cravings have become somewhat of a thing with me. My go-to is classic: a plate-sized Yukon gold smashed with butter, kosher salt, cracked black pepper, and lots of sour cream. The winds of change had me in their grips the other day, inspiring me to mix it up. I madly added things from the fridge like a [hungry and impatient] mad scientist and chuckled when I realized that my combo was green- a Frankenstein potato!
Behold, my creation!

destiny! destiny!
BAKED POTATO WITH AVOCADO AND GREEN ONION
Ingredients:
- 1 medium/large Yukon gold potato
- butter
- salt and pepper
- avocado
- sliced green onions
Bake or microwave your potato. I am a microwaver. When I want a baked potato, I want it within the next ten minutes. No judgement here for my lazy, impulsive kinsfolk. Cut in half, smash up with a fork, sprinkle with salt and crack on pepper, add a few pats of butter and smash up a little more, smash on some buttery avocado, and top with green onion. Hell of a snack.

Butternut Squash and Kale Mash with Toasted Walnuts and Sage (gf, veg, v option)
Greetings, hungry blogosphere! Today’s post is sinfully tasty vegetarian feast and a retooled version of a recently republished Ree Drummond recipe. That Ree Drummond? The accidental country girl-slash-Pioneer Woman? Yep, that one, I luh her. I’ve subscribed to her blog for years (haven’t seen the show so I’m absolved if it’s terrible). She’s a very funny writer who cooks like a real person who feeds other real people in real situations and really loves real food. No “poached quail eggs in nests of freeze-dried seaweed” from The Pioneer Woman. Phew! “Thanks, Ree!” cried happy stomachs everywhere.

another reason I like Ree: she occasionally punctuates her posts with cheeky pictures like this one
The Pioneer Woman’s butternut squash and kale recipe is no exception to her practical/delicious formula. It’s simple, fast, healthy, hearty, and can be used in roughly one bajillion ways. Get a load ofof Ree’s fabulous suggestions for using the mixture: in quesadillas! stirred into risotto! in a grilled cheese sandwich! in a pita with chicken! puréed with broth to make soup! tossed with bowtie pasta, olive oil, and Parmesan! as an appetizer, on crackers with goat cheese! alone, on a plate!

Basically, regardless of which of the bajillion ways you serve this dish, it will be delicious, so make a big pot. I added onion, sage, and walnuts to my version and we enjoyed it with turkey cutlets Dave made. He was the Marlboro Man to my Pioneer Woman as we cooked. Ree Drummond joke. NBD.

BUTTERNUT SQUASH AND KALE MASH WITH TOASTED WALNUTS AND SAGE
Ingredients:
- 1 12-oz bag chopped kale, or 1 head kale, roughly chopped with stalks removed
- 1 bag cubed butternut squash or 1 butternut squash, cubed and peeled with seeds removed
- 1 small yellow onion, diced
- 2 tbsp butter
- 2 tbsp olive oil
- 2-3 tbsp water
- 1/2 tsp kosher salt
- 1/2 tsp ground sage
- 1/4 tsp chili powder
- a few grates of fresh nutmeg
- cracked black pepper, to taste
- 1/3 cup raw walnuts
Directions:
In a deep saucepan or cast iron skillet, heat the butter and olive oil over medium. When the butter has melted and is slightly foamy, add the onion and sauté until translucent. I love this smell.
Add the butternut squash, salt, sage, nutmeg, and chili powder and saute about 5 minutes, until all sides have had a some time with the direct heat. Reduce heat to medium-low and cover with a lid, steaming for 5 more minutes until the squash is soft. The steaming makes this dish a mash; if you’re looking for a more caramelized consistency, be patient and sauté until golden brown.


While the squash steams, toast the walnuts in a small nonstick skillet over medium, tossing so they don’t burn. They’re done when they’re a fragrant, toasty brown. Remove from heat and set aside.

When the butternut squash is soft, remove the mixture to a large bowl and return the pan to the stove, turning the heat back up to medium high. Add 2 tablespoons water and bring to a simmer. Add the torn kale leaves and stir around for a few minutes, letting them wilt. If they get dry, add another tablespoon water.


When the leaves have wilted and broken down (break them! break their spirit!), stir them into the squash, tasting for seasoning and grinding in as much pepper as you’d like. Top with the toasted walnuts and serve!
Field Trip: Sazerac Tuesday at Old Standard Fried Chicken
My friend Jen and I have established a fabulous ritual that all cocktail-minded women of the world should consider: Sazerac Tuesdays! Sazerac Tuesdays: the best thing to happen to work weeks since weekends. Basically, we meet at various St. Louis cocktail spots and restaurants on Tuesdays and order Sazeracs. It’s a great tradition and you should try it. You should try it every Tuesday.

not Monday, not Wednesday…. Sazerac Tuesday!
Jen is my favorite souvenir from our trip to St. John earlier this year. Dave and I encountered Jen and boyfriend Anthony (aka The Skeptical Cardiologist: find his unbiased, evidence-based, heart-healthy musings here) at the Fatty Crab in Cruz Bay one night; we discovered they were also from the STL area and also discovered they’re lots of fun and pretty great all-around; they had us at “yes, of course we should order another round of picklebacks.” Great minds thinking alike in boozy paradise.
Upon returning to St. Louis, Jen and I have Sazerac-ed Gamlin Whiskey House, The Royale, Pastaria, and Old Standard Fried Chicken and have separately Sazerac-ed at Planter’s House and Taste. This city is big and has become a stellar place to have a stellar cocktail. There is much more Sazerac-ing to be done around St. Louis, and we’re just the women to do it.

here we come to save the daaaay!
Our most recent ST spot was Old Standard Fried Chicken. Old Standard is the brainchild of Ben Poremba, Tower Grove food wizard who brought Elaia, Olio, and Choquette to our fair city. The small restaurant, housed in what used to be a police stable on Tower Grove Avenue, showcases well-executed fried chicken and an impressive selection of American whiskies. Poremba brings in his chickens from Miller Poultry in Orland, Indiana, a natural and humane poultry farm I envision to be not unlike the one in Portlandia (“Is it local?” “Yes, this is the chicken you’ll be enjoying tonight. His name was Colin, here are his papers…”). They’re fed an all-vegetarian diet and are hormone and antibiotic free. The chickens also vote in every election, support urban farming, and don’t vaccinate their children.

before…

and after! photo credit: Feast Magazine
before Poremba, courtesy Google street view… after Poremba, photo credit Feast Magazine
After being brined and cooked in a pressure fryer to ensure consistency, Old Standard’s ethically raised, finger licking chicken is available à la carte, a service option that should be available at every restaurant with fried chicken on its menu. Jen and I started with the biscuit and bread basket, which came with a flaky biscuit, a fluffy biscuit, two types of cornbread, and our choice of three butters or jams. We went with the lemon-honey and pistachio-mint butters and the stone fruits jam. The biscuits were flaky and fluffy as promised, and the pistachio-mint butter was a real standout- I slathered it on every bite of bread I took. At just $7, the basket was a steal with quality much higher than its price and a good amount of food for two people.
 We each ordered a chicken leg, agreeing over our Sazeracs that dark meat trumps white meat, and split an order of skinny fries with blue cheese mayonnaise. I like eating with this girl because she’s not afraid to EAT FOOD. Butter? Yes. Dark meat? Yes yes. Blue cheese mayonnaise? Yes yes yes. YOLO, as the kids say. Our chicken legs and fries came out and my eyes, glittering with the reflection of drumsticks, had for once ordered appropriately for my stomach. Old Standard’s chicken legs are of a generous size, very juicy, not at all greasy, and have a slightly sweet flavor to it from the brine and possibly from the impeccable lifestyle they led before coming to Missouri. The fries were hot and crispy, the way Steak and Shake fries claim to be but never are, and the blue cheese mayonnaise- well, how could blue cheese mayonnaise be bad?

To enjoy with the chicken and coming in just above my beloved pistachio-mint butter was another Better Than It Has To Be house-made condiment: Old Standard’s hot sauce. We ate at the bar and I was lucky enough to glimpse a nondescript but promising reddish-orange bottle behind the counter and requested that it be passed my way. Good things come in unmarked squeeze bottles. Let me tell you: this stuff should be served at the door in shots. It’s perfectly balanced- spicy but not fiery, tangy but not a vinegar punch to the mouth, and quite literally made to be eaten with Old Standard’s fried chicken. I enjoyed my chicken leg in bliss, strategically exposing every nibble of crispy, meaty real estate onto which I could squeeze the hot sauce. If you go, please do yourself a favor and ask for it.

Lolo like-a da hot sauce
I suppose I should mention the Sazeracs since they got us here, didn’t they? They were great. You should go get one sometime. That’s all I have in the way of a Sazerac review- either they’re done well or they’re not, and OS didn’t mess around. In the way of beer, Urban Chestnut has an “Old Standard” pilsner on tap here- it’s quite tasty and pairs well with the chicken. Hints of honey, and it’s served in a stein (awesome). Anthony met us later in the night and was equally impressed by the chicken and by a side of braised red cabbage served in an individual cast-iron pot. On my next Old Standard visit, which I hope is sooner rather than later, I’m ordering the pickles, the boiled peanut hummus, and the greens (check out the rest of the creative yet authentically Southern menu here). It’s doubtful that anything on the Old Standard menu is less than outstanding; you owe it to yourself to check it out. Shoot, treat yo self. Maybe on a Tuesday… A Sazerac Tuesday.
Creamy Crockpot Pinto Beans (gf, v option) and Gluten-free Cornbread (gf, veg)
The Missouri November weather was spectacular last weekend. Dave and I went on an epic, 3-hour, 10+ mile hike around the Weldon Spring area to enjoy said Missouri November weather, beginning and ending at the Weldon Spring Disposal Cell. What is the Weldon Spring Disposal Cell, you ask? Well, we wondered the same thing. It’s a 45-acre mound of rocks covering layers of nuclear waste. And you can walk to the top! How’s that for a bizarre tourist attraction?

view from the top
The Us Army Ordinance Works purchased the site and adjacent land (17,232 acres- whoa) in 1941. The Army contracted the Atlas Powder Company to manufacture trinitrotoluene (TNT) and dinitrotoluene (DNT) at a sprawling factory complex on the site until 1945 to support World War II efforts. After the war, the Army started selling off the land but kept about 2,000 acres to house the Weldon Spring Uranium Feed Mill Plant, which was just what it sounds like- a uranium ore processing plant that operated from 1955 to 1966. Uranium ore processing plants produce well, radioactive waste, and that, kids, is what’s tucked beneath the Weldon Spring Disposal Cell.


I’m hesitant to believe that the waste isn’t harmful to the surrounding communities or people walking all over the cell, but so far, I feel no strange after-effects. I can see better, though. Strange…. Anyway, we were starving when we got home and had breakfast-for-lunch, with the addition of these warming, slow-cooked, creamy pinto beans and leftover cornbread to dunk in them. I’d soaked the beans overnight the night before and put them in the crockpot before we headed out, so only finishing touches were left to be made when we got back. The cornbread originally accompanied some white bean chicken chili we’d made and heated up well to go with the beans. So, without further ado, creamy crockpot pinto beans and gluten-free cornbread!

CREAMY CROCKPOT PINTO BEANS
Ingredients:
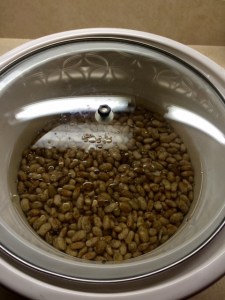
- 1 bag dry pinto beans, rinsed and sorted
- water
- 1 tsp kosher salt
- freshly ground black pepper
- 2 slices bacon, chopped, or 2 tbsp olive oil for vegan beans
- 1 yellow or white onion, diced
- 4-5 cloves garlic, chopped
Directions:
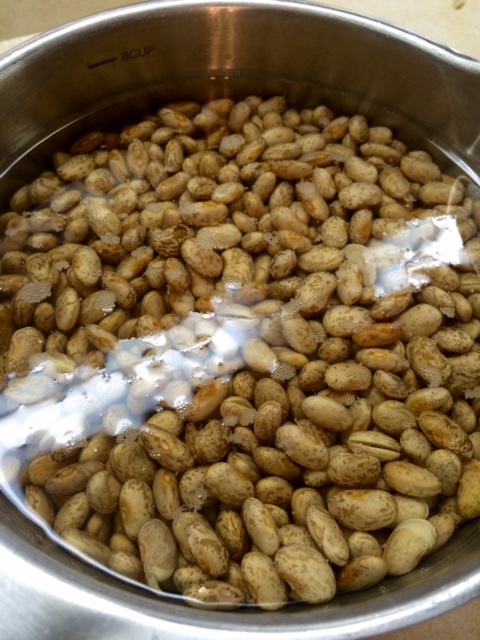
Rinse the dry beans after you pick them over for any rocks or clumps of dirt. Finding rocks and clumps of dirt in bags of dry beans isn’t as far-fetched as it sounds, but it is every bit as gross as it sounds, so look ’em over good. Put the beans in a bowl and cover with an inch of water, soaking at least 8 hours or overnight. How retro-frugal you are, soaking beans! Good for you. The WWII-era Real Housewives of Weldon Spring would be proud.
RHOWS
When the beans have had a good soaking, dump their soaking water, rinse them again, and put them in your crockpot. Cover with water, up to 1/2 inch above the beans. Keep in mind that when cooking in a crockpot, the water added to a recipe will stay put, so add as much as you’d like or not like. Cover and set to low for 8 hours or high for 4. Take a hike.


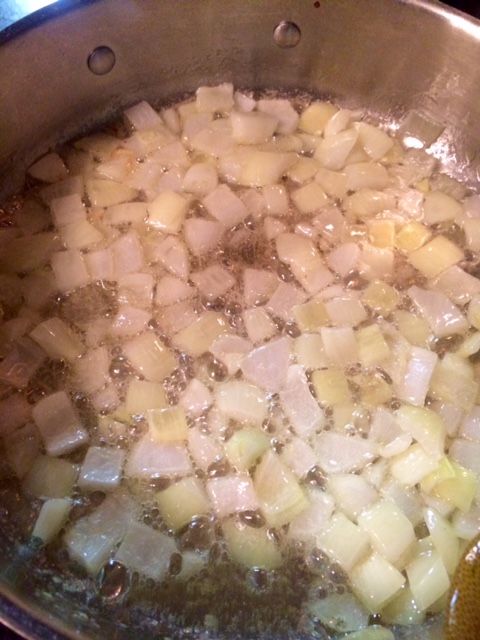
When you return from your hike/nap/workday/classified mission, chop the 2 pieces of bacon and cook them over medium in a small skillet until crispy. If you’re omitting bacon, heat the olive oil over medium. Remove the bacon once it’s crispy and add the onion to the bacon fat or olive oil, cooking for 3-4 minutes until translucent. Add the garlic and cook another minute.


Salt and pepper the onions, and add the onions, bacon, and 2 cups of beans to a food processor. Whir that sucker until the mixture is smooth and creamy, then stir the mixture back into the pot of beans.


You’re all done! The beans are even better the next day. They’re rich and creamy and make a perfect partner for a few hunks of….
OLD FASHIONED GLUTEN-FREE CORNBREAD
Adapted from Gluten Free On a Shoestring
Ingredients:
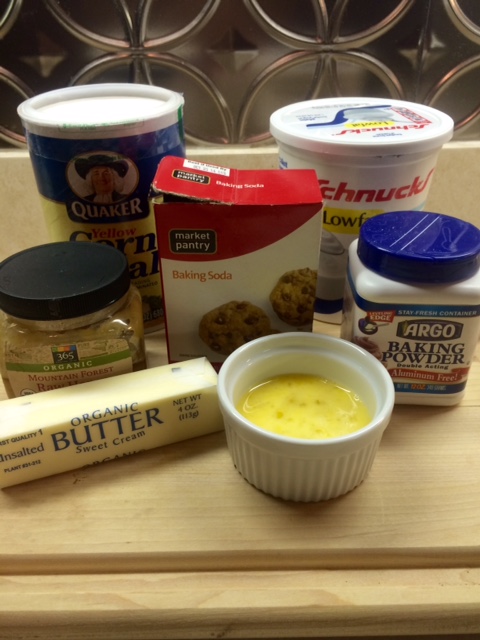
- 2 cups yellow cornmeal

- 1 tsp baking soda
- 2 tsp baking powder
- 1 tsp kosher salt
- 1 room-temperature egg, beaten
- 4 tbsp melted butter, cooled
- 1 1/2 cups room-temperature plain yogurt
- 4 tbsp raw honey
Directions:
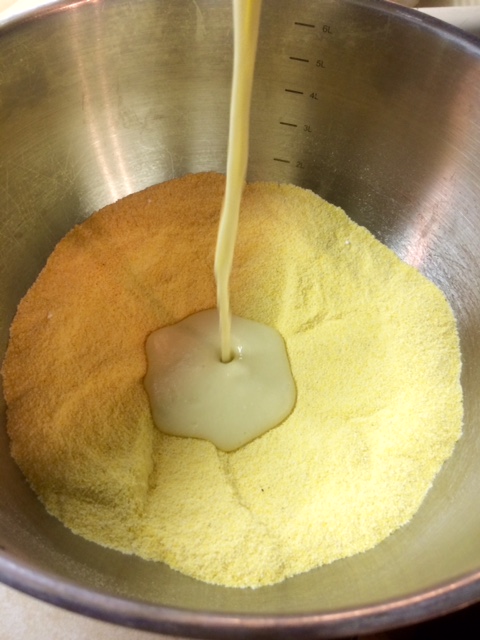
Grab two bowls and preheat your oven to 400. In the larger bowl, whisk together the dry ingredients: cornmeal, baking soda, baking powder, and salt.

In a second, smaller bowl, whisk together the wet ingredients: egg, butter, yogurt, and honey.

Now make a well in the middle of the dry ingredients in the large bowl. See where this is going? Now you know why the dry ingredients got more bowl-love than the wet ones. Pour the wet ingredients into the center well and mix until just combined.
Grease a cast-iron skillet or 9×13″ pan and spread the cornmeal mixture in evenly. Bake for 20 minutes, until the top is golden-brown.
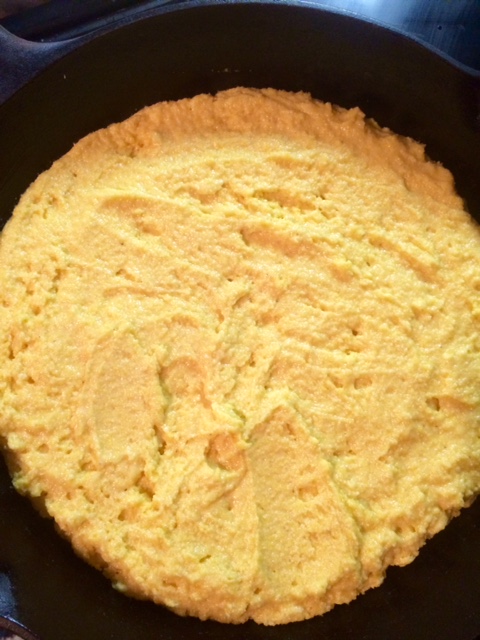
This celiac husband-friendly side was quite tasty. It held together well but was also crumbly, and would be great with the addition of cheddar cheese or chopped green chiles. It was great with the white chili and stood up to the beans. What will you serve with yours?


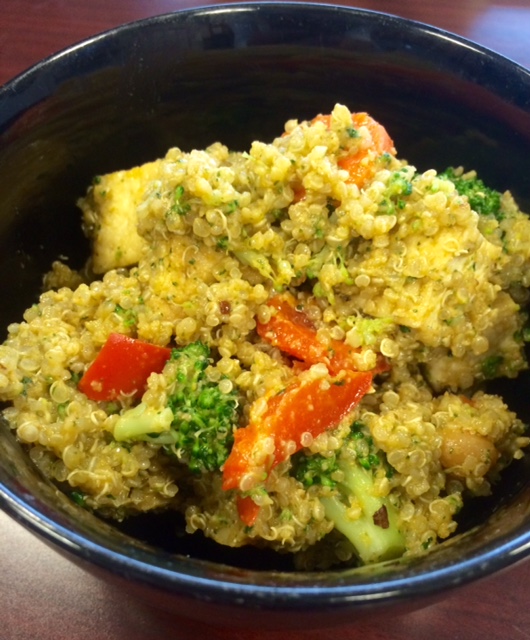
Spicy Thai Coconut Quinoa & Veggies (v, gf)

OMIGODYOUGUYS Somehow, allez! gourmet, my beloved little hobby blog (hobblog?), has been visited over FORTY THOUSAND times and today marks my HUNDREDTH post!

a hundred, shaZA-yum!
I started the blog in January 2012 as a new year’s resolution to share recipes on a regular basis, which I’d previously been doing via Facebook. Sharing on FB was neither pretty nor enjoyable. Remember Notes? Ew. Realizing how much I loved to write about cooking and food, I thought I’d better give a proper blog a try. I’m so glad I did! I have had so, so much fun working on a!g. Posting has been an exciting challenge, inspiring me to try new recipes and put my voice out into the great unknown. Putting myself out there was an intimidating prospect! “Who will read this?” I wondered. “Will anyone find it? Will my blog have critics?… Is this thing on?” Mysteriously, the interwebs worked their googly magic and people other than my mom started visiting the blog, unprompted. allez! gourmet’s biggest hit by far has been 2013’s peanut butter & cinnamon greek yogurt dip. It’s probably the simplest recipe I’ve posted and it’s viewed over 100 times a day. A day. Crazy! So, instead of learning from the peanut butter dip’s lesson that readers love simplicity, today’s 100th post is multi-stepped (but quite representative of my kitchen). Ha! Enjoy and, as always, thanks for reading!

mmm, nutrition…
SPICY THAI COCONUT QUINOA AND VEGGIES
Ingredients:
For the dressing
- 1 1/2 cups cilantro leaves, washed and stems removed
- 3/4 cup unsalted, roasted peanuts
- 2-3 cloves garlic or more if you’re so inclined
- 1/4 cup sesame oil
- 1/4 cup sriracha
- 1 tbsp brown sugar
- 1/2 tsp kosher salt
- 6 tbsp hot water
For the quinoa
- 1 3/4 cups uncooked quinoa
- 1 can coconut milk
- 1 cup water and 1 tsp vegetable base, or 1 cup veggie stock
- generous sprinkle kosher salt
For the tofu and veggies
- 1 block firm, organic tofu, cut into large dice
- 2 tbsp coconut oil
- kosher salt
- 2 carrots, peeled and cut into coins
- 1 red bell pepper, roughly chopped
- 1 bag fresh broccoli florets, or the florets from 1 head broccoli
Directions:
This is a classic vegan grain and veggie bowl. Make the grain, boil veggies, cook the tofu, then toss it all with a raw and incredibly flavorful dressing. You will feel healthier just by smelling this stuff. Prepping the dressing is the best part of this meal: add all dressing ingredients to a blender or food processor, and blend until smooth. Voila! Set aside. If you’d like the peanuts to have a bit more oomph, toast them in a skillet first.


On to the quinoa. As the quinoa cooks, you’ll have plenty of time to par boil the veggies and cook the tofu. In a saucepan fitted with a lid, add the quinoa, water and base or broth, can of coconut milk, and salt. Bring to a boil, then reduce heat and simmer over medium low for 20 minutes. Stir this once or twice as it cooks.

riveting photo, eh? I barely remembered to snap a pic of the quinoa at all…
While the quinoa bubbles along, dice the tofu and set the chunks on a plate lined with paper towels to drain a bit. I put two paper towels under the tofu blocks and one on top, which absorbed a good amount of excess moisture. Chop your veggies as the tofu drains. In a deep saucepan, heat the coconut oil over medium high. When hot, add the tofu chunks in a single layer, and cook for about 3 minutes before flipping. Flip each piece over and cook another 3 minutes until the tofu is a pretty golden-brown color.


Remove the cooked tofu to the same plate it was on earlier, lined with a clean paper towel, salting the tofu to taste. Add hot water to the saucepan you cooked the tofu in (no need to clean it out- hooray!) and bring to a boil. Add the red bell pepper, broccoli, and carrots, and boil for 3 minutes. Drain the veggies in a colander when three minutes is up. All done! Now to mix it together! In a large mixing bowl, mix the quinoa, drained veggies, and dressing. Fold in the tofu blocks and garnish with scallions, cilantro, or additional chopped peanuts… and serve. Delicious! A complete meal in one dish. This yummy bowl is fabulous hot and works at room temperature as well, making great picnic or packed lunch fare.
The meal was so tasty, I didn’t take any photos of my plate. Instead, enjoy two unrelated fall-themed pics from last night. November is in full swing! Thanks again for reading, and I raise my pumpkin ale to you!


Update! Here’s a picture of the next day’s lunch:
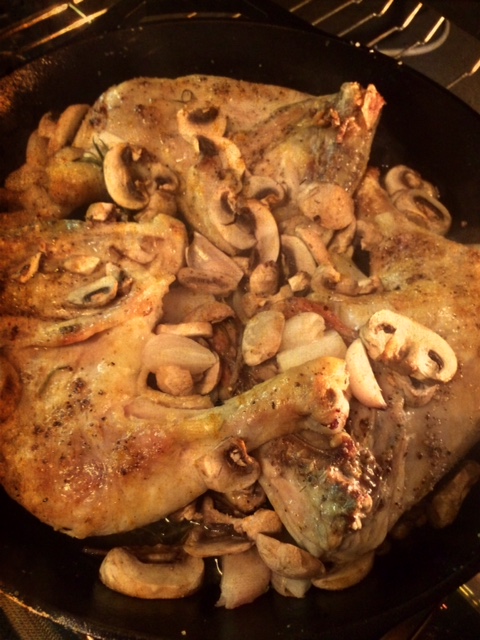
Chicken Roasted with Mushrooms and Shallots & Garlic Mashed Cauliflower (gf)
We’re officially on the gluten-free express train. Our kitchen was mostly gluten-free before Dave’s diagnosis but now there’s actual gluten protocol to follow (i.e., no gluten at all en la casa). This isn’t a huge deal, as I can always scarf chewy chunks of Panera baguette in my car and continue to have glutinous adventures at work, where we eat as if it’s the last day on Earth everyday (they get me).

The new rules have inspired creativity [when I’ve had time to cook], as evidenced in last night’s ingenious mashed cauliflower. What a great idea! Total mashed potato fake-out. Yes, potatoes are gluten-free but cauliflower is a lower GI food, has more vitamins, blah blah blah. The mashed cauliflower can be as light or as creamy and indulgent as you’d like and, as for the roasted chicken, it’s delicious and easy and everyone loves roasted chicken. That’s all the intro roasted chicken ever needs. ‘Twas a hearty, warming, comforting dinner perfect for fall.
CHICKEN ROASTED WITH MUSHROOMS AND SHALLOTS
Ingredients:
- 2-3 tbsp olive oil
- 3 chicken leg quarters, skin-on
- kosher salt & freshly ground black pepper
- 1 pint white mushrooms (about 12), washed well and sliced
- 4 large shallots, quartered
- 2 sprigs fresh rosemary
GARLIC MASHED CAULIFLOWER
Ingredients:
- 1 head cauliflower, cut into florets, OR 2 bags pre-cut cauliflower
- 1 clove garlic, minced OR 4-5 cloves roasted garlic
- 1 tbsp cream cheese, softened and/or 2 tbsp chèvre
- 1/4 cup grated Parmesan
- 3 tbsp butter, softened OR 2 tbsp milk
- 1/8 tsp chicken bouillon or chicken base
- cracked black pepper
- fresh snipped chives
Directions:
Both of these recipes are pretty quick. The chicken pan roasts, then finishes in the oven; the cauliflower boils and is puréed. Facilisimo. Let’s start with the chicken and then make the cauliflower as the chicken roasts. Preheat your over to 350. In a cast iron or other oven-safe pan, heat the olive oil over medium. If you’re making cauliflower now, bring a large pot of water to a boil. Sprinkle both sides of the chicken leg quarters liberally with salt and pepper and add, skin-side down, to the hot oil.


Cook for 5 minutes, letting the skin brown. Flip over and cook the backsides for 5 minutes as well. You may want to use a splatter guard, as the olive oil will be deliciously crackly and splatter-prone.


When both sides have browned, top the chicken with the sliced mushrooms, shallots, and rosemary, tucking the veggies in between the chicken pieces. Slide the pan into the hot oven and let roast for 20 minutes. Cauliflower time! If you haven’t already, bring a large pot of water to a boil. Add the cauliflower florets and boil for 6-8 minutes, until softened. Drain well in a colander, but don’t let the cauliflower cool off too much- you’ll use its heat to melt and disperse the cheeses and butter (mmm, melting cheeses and butter).


When the cauliflower has drained, add it to a food processor or put it back into the pot you boiled it in if you’re using an immersion blender. Add your chosen cheeses, garlic, bullion, milk, and pepper. Blend. Taste for seasonings and consistency and adjust as needed (salt, pepper, more milk, more cheese, etc.). Eat a few spoonsful and top with chives. Back to the chicken!
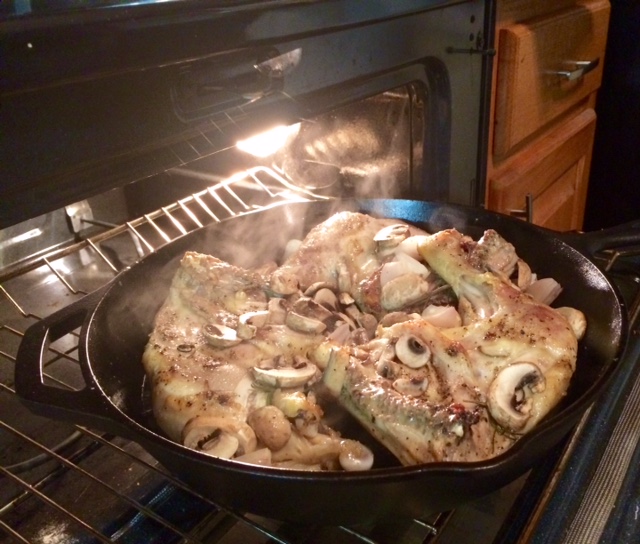
photo credt: Dave Cruse
The amazing part is, your chicken is done. It will look fabulous. Remove the chicken and veggies to a platter, discarding the rosemary sprigs, and let rest for 5 minutes before serving to lock in the juices (I love saying that). Lock ’em in. Now would be the time to make a simple pan sauce or sprinkle with lemon juice, if you’d like. The dish is certainly tasty enough to not need a sauce, but it wouldn’t hurt. Pour a glass of wine (pairing recommendations here), scoop up some cauliflower, cut a piece of chicken, and enjoy.
