So it’s springtime. Allegedly. Can’t verify that for you right now, I’m too busy scraping ice off of my windshield. Or at least I was this morning… Sheesh! This should be the time to make chilled soups and bright, minty salads dotted with neon green peas! Instead, I find myself craving warmth, spice, and honestly, detoxification, thanks to an overzealous Friday night with friends (who are totally worth celebrating- hello, ladies). So I suppose that will be my spring theme for this delectable Korean-inspired recipe: renewal!
The spicy, fragrant, good for you star of this detoxifying soup, kimchi, is a Korean side dish made with fermented vegetables, mainly cabbage. While kimchi is near and dear to my heart, all fermented and cultured foods are powerful nutritional underdogs. I’ll quote Casey Seidenberg’s Washington Post rundown of why we should all be eating fermented foods: Seidenberg, co-founder of D.C.-based nutrition education company Nourish Schools, says,
“Organic or lactic-acid fermented foods (such as dill pickles and sauerkraut) are rich in enzyme activity that aids in the breakdown of our food, helping us absorb the important nutrients we rely on to stay healthy. | Fermented foods have been shown to support the beneficial bacteria in our digestive tract. In our antiseptic world with chlorinated water, antibiotics in our meat, our milk and our own bodies, and antibacterial everything, we could use some beneficial bacteria in our bodies. | When our digestion is functioning properly and we are absorbing and assimilating all the nutrients we need, our immune system tends to be happy, and thus better equipped to wage war against disease and illness.”
What a delicious way to get the good bugs in our systems- by EATING! If kimchi’s not your style you can nosh on sauerkraut, beer (easy, tiger, easy), stinky cheese, dill pickles, yogurt, miso, sourdough bread, and kombucha to make your tummy and immune system happy and healthy. Or if you like kimchi and have five minutes, you can make this soup. Happy winterspringtime, everyone!
2 tsp low-sodium vegetable cooking base or 2 tsp bouillon
1 tbsp low-sodium tamari or soy sauce
1 tsp sesame oil
1 tbsp Korean chili paste or garlic chili paste, such as Huy Fong
1 bunch scallions, sliced and divided
eggs, optional
Directions:
Chop your kimchi into bite-sized pieces. You may eat as much as you want as you chop. Watch your fingers.
Dice the tofu block. It’s really fun.
Mix the kimchi and vinegar and add to a large stockpot. Add the water, cooking base, tamari or soy sauce, sesame oil, chili paste, and half the scallions. Stir this together, then gently stir in the tofu blocks and bring the soup to a boil. If you’d like, crack a few eggs into the boiling soup and cook until the whites are opaque. If not, serve and top bowls with remaining fresh scallions, passing sesame oil around. So very tasty and so, so good for you.
This vibrant, fragrant dish makes me happy. Its colors and flavors of make me think of lovely Nepal and of colorful Northern India, which I imagine to be one of the most lively places in the world. The tantalizing smell of onion, ginger, and garlic cooking in coconut oil will make your kitchen feel like this:
Holi festival! photo: National Geographic
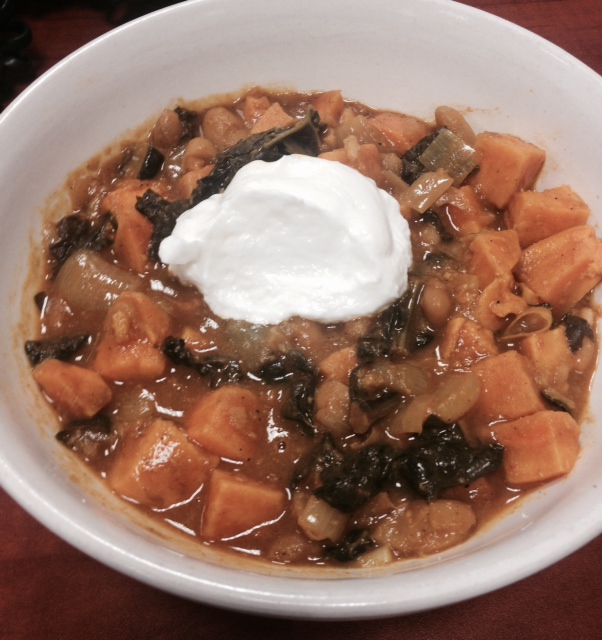
Korma is derived from the Urdu word ḳormā, or “braise.” Even though there’s no meat in this dish, you braise the sweet potatoes by cooking them with curry powder, onion, and a bit of tomato sauce before simmering them in coconut milk with kale and white beans. You can serve this korma with rice if you like or serve as a side dish. I found that it really holds up on it’s own; I dolloped mine with some plain Greek yogurt for a hearty meal. स्वादिष्ट (delicious)!
In a large stockpot, heat coconut oil over medium. Add the onion and saute until it’s translucent, about 5 minutes. Add the garlic and ginger and saute another minute.
Add the sweet potatoes, curry powder, and tomato sauce. NOTE: if you don’t like curry powder (and many people don’t), omit it for Pete’s sake. Add paprika or brown sugar and pepper or red curry paste, or nothing or anything you like in its place. But if you do like curry powder, add it now. Continue to cook the sweet potatoes over medium for about ten minutes, until they begin to soften a bit.
Add the coconut milk, kale, and white beans. Bring the korma to a boil, cover, reduce heat to medium-low, and simmer for 20 minutes.
look at that nutritious jumble!
That’s all! Uncover and serve, you wholesome and adventurous veggie-lover, you. Top with yogurt or diced cucumbers. Enjoy!
I love eggplant parmesan. I love lasagna. I do not necessarily love heavy meals that can’t be scarfed without guilt and/or heartburn unless those meals involve pizza and/or cookies, which have their own special place in my life and in the universe. This lasagna is really a lovely meal to serve, is very cheap to make, and is easy to assemble. Fresh veggies, grain free, a blender sauce, creamy ricotta, earthy eggplant, light and rich all at once. Ahh.
So satisfy your Italian cravings and up your veggie intake. I served it with mixed greens on the side and Parmesan for passing. How will you serve your eggplant lasagna?
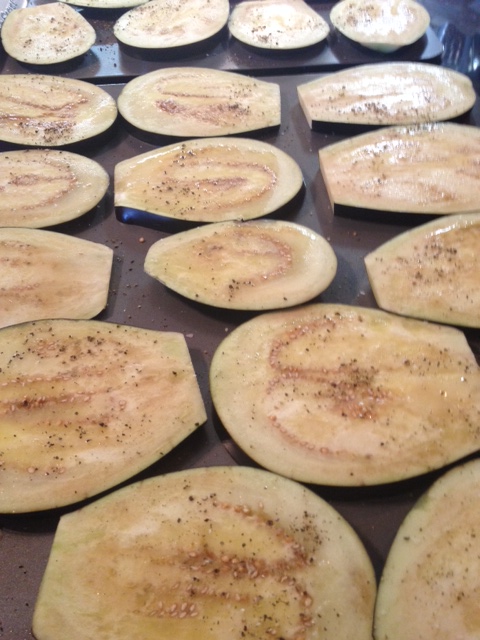
You will probably want to slice your eggplant first, as it’s the only pseudo labor-intensive part of this recipe. Cut the top off of your eggplants so you can stand them sturdily on one end. With a large knife, slice them in 1/4 inch slices from top to bottom (you may instead slice the eggplants horizontally, if you like; comme ci, comme ça). Brush both sides of the slices with 2 tbsp olive oil and sprinkle with salt and pepper, then arrange on two baking sheets.
sliced and ready to broil
Okay, now preheat your broiler. While it heats up, puree garlic, 1 tbsp olive oil, and 1/4 tsp each salt and pepper in a blender. Sauce: done! Fabulous! Slide the first baking sheet of eggplant into the oven and broil your rustic slices for 3-4 minutes per side, flipping once. Repeat with the second batch.
While the eggplant cooks, grab a small bowl and combine the ricotta, egg, basil, and another 1/4 each salt and pepper. Mix throughly to combine. When all eggplant slices have been broiled, lower the oven heat to 400. In the bottom of a deep 8″ baking dish or a 9×13″ dish (whichever will hold the length of your eggplant slices), spread half of the tomato sauce. Layer one-third of the eggplant slices over the sauce and top with half of the ricotta mixture. Repeat the eggplant layer and the ricotta layer, using the remaining ricotta. Top with the last of the eggplant, the sauce, the Parmesan, and a few decorative basil leaves if you’re feeling fancy.
Bake for 15-20 minutes, uncovered, until the lasagna bubbles and the top is slightly browned. Take an artful picture of your cat in the meantime.
rawr
Remove lasagna from the oven and let cool ten minutes before serving. The mixed greens with oil and vinegar really were a perfect accompaniment. We had a few chicken breasts left over from the night before, so we had those, too. The greens alone would have been fine. This meal makes a very pretty and light lunch or dinner, all while being easy on the wallet and waistline. Enjoy!
Need a quick dinner idea? Have little time but want lots of flavor? Do you have a pound of shrimp or chicken and a green vegetable handy? Let’s do this.
COCONUT-CHILI SHRIMP & SNOW PEA BROWN RICE RISOTTO
1 tbsp red curry paste (or increase chili garlic paste by 1/2-1 tbsp)
1 tsp kosher salt
1 can light coconut milk
4 cups cooked brown rice
1 scallion, sliced (optional)
juice of a lime (optional)
Directions:
Heat the coconut oil in a deep saucepan over medium high heat. When the oil is hot, add the shrimp or chicken and cook, stirring, until no longer pink (3 minutes for shrimp, 5 minutes for chicken). Remove the cooked shrimp or chicken to a plate and add the coconut milk, chili paste, salt, and red curry paste to the pan; bring to a boil and lower heat to simmer, allowing the sauce to reduce to about half. Add your green veggie and cook 1 minute more. Stir in the rice, shrimp or chicken, and lime juice, stirring to combine, and cook two minutes more (or until rice is hot). Top with sliced scallion and serve! Easy snow-peasy!
Fennel. So lovely, so fragrant, so exotic-looking when wedged between carrots and celery in the produce section, like a ballerina on a bus. It stumps check-out clerks and home cooks, causing both to miss out on its nutritional benefits if they do not know what in the heck to do with a bulb once they’ve brought it home.
feathery fronds
Fennel packs vitamin C, fiber and potassium in each serving, making it a nutritional powerhouse and especially beneficial to runners and athletes recovering from hard workouts. Low in calories and incredibly flavorful, it’s a stellar addition to any home menu. All while earning you “cook unafraid of unusual vegetable” points (score!).
My favorite way to prepare fennel is the simple braise outlined below; another favorite is tossing it into this A!G Provencal Fish Stew. This braise pairs well with chicken, fish, or pork, or with loads of other veggies- I’ve served it alongside roasted carrots, onions, and brussels sprouts as a hearty all-veggie dinner. Hope you enjoy! And how else have you prepared fennel?
3 large fennel bulbs, trimmed and sliced (you can use the stalks as well)
1 cup broth or 1 cup water and 1 tsp vegetable base
4 tbsp butter- this sounds like a lot but bear with me
3 cloves garlic, minced, or 3 tsp crushed garlic
2 tbsp fennel seeds
Directions:
After prepping the fennel, this recipe is a one-step wonder. You’ll toss all of the ingredients into a saucepan and cook in just a moment. Clean your fennel bulbs and cut off a slice of the thick root end. Lob off the fronds and reserve for another use and cop the stems and root into 1-inch slices. I find it easiest to quarter the bulbs and cut from that point.
Now before you toss everything into your pan, let’s talk butter. Recent studies have shown that “bad” saturated dietary fat, if it comes from high-quality organic sources (think organic butter from grass-fed cows, grass-fed or pasture raised beef, raw cheeses, strained organic yogurt, whole organic milk, eggs form pasture-raised chickens, etc.), may not be that bad after all. Scientists and the food-minded argue that it’s the highly-processed trans fats and chemically altered saturated fats and preservatives that are killing us. A 2010 study by the American Society for Nutrition concludes that:
“A meta-analysis of prospective epidemiologic studies showed that there is no significant evidence for concluding that dietary saturated fat is associated with an increased risk of CHD (coronary heart disease) or CVD (cardiovascular disease).”
WHOA. In a recent conversation about the saturated fat vs. high-quality full-fat food debate, a friend pointed out that the food our healthier, more active, longer-living grandparents ate was full fat, was often organic before that was a “thing,” was fresh, and was more satiating due to its high fat (and fiber) content. Hmm. Very true. Our grandparents also ate more vegetables and whole grains than we do- no slabs of meat at each meal and no bags of Doritos and partially hydrogenated cheese dip. And they ate smaller portions. The argument for full-fat foods does not, by any means suggest that eating plates of hand-cured, gourmet, farm-raised bacon with six eggs and toast slathered in butter is a good for you- everything in moderation, my friend. Journalist and food activist Michael Pollan, with whom I’ve recently become obsessed, says it best:
“Eat food. Not too much. Mostly plants.”
So to celebrate that mantra and to test the new theory, which makes perfect sense in my mind, let’s eat veggies and use butter today! Back to the recipe. Add all ingredients to a deep saucepan and bring to a boil. Reduce heat, cover, and simmer for 10 minutes. Uncover and continue cooking over medium for another few minutes, until most of the cooking liquid has evaporated; don’t allow the fennel to get mushy. There you have it! Serve. What are your thoughts on the saturated fat debate? I’d love to hear your comments below!
Dave and I were fortunate enough to visit the most beautiful place in the world recently: the U.S. Virgin Island of St. John. The island is 2/3 national park (whaaa!), has beaches varying from pristine white sand with aquamarine water to grassy turtle habitat to all smooth, gray rock, it’s dotted with Dutch and Danish sugar mill ruins, and it’s crisscrossed with challenging and well-maintained hiking trails. The fact that the majority of the island is a park keeps the riff raff out (airports, huge all-inclusive resorts, restaurant chains, shopping malls) and that’s helped the wildlife, flora, coral, and sea life stay healthy and breathtaking. It’s pretty much the real-life Neverland. I know this because the people of St. John each have a glinting glimmer of Lost Boy in their eyes.
Neverland, I tell ya
We fell in love the moment we arrived and swam, hiked, and ran over as much of the island as we could during our stay. We snorkeled daily, swimming with hawksbill turtles, myriad tropical fish by the school full, barracuda, rays, and even a large eagle ray. Rarely have I come back from a vacation in better shape than I left, but that was definitely the case coming home from St. John. And while the scrubby Missouri hills of home can’t compare to the vertical, emerald green volcanic mountains of STJ, I am determined to forge a hiking habit this summer, ticks be damned. Each day after hiking and swimming, we’d head to better-than-they-have-to-be food and drink spots like the Fatty Crab (order the Recession Special), Sam & Jack’s, Vie’s Snack Shack for conch fritters, Skinny Legs for burgers, live music, and shots with locals, and Asolare (go straight to the bar to meet Kim, master mixologist). I’m telling you, if you’re an outdoorsy nature lover who also enjoys outstanding and creative food, people, and drink, St. John may very well be the island for you. It certainly stole our hearts.
Outside of physical exertion and rum-swilling good times, a highlight of our trip was an incredibly romantic dinner Dave booked with Ted’s Supper Club, a well-known private chef service on the island. We were agog watching Ted cook. A-freaking-GOG. The skilled and professional Chef Ted whipped up an unforgettable meal of salad, dumplings, scallops, fish, veggies, lava cake, and a deep-dish focaccia bread with pesto and tomatoes cooked in cast iron that held us over for days. The focaccia really made an impression on us and I vowed to make it when we got home. That was in January; we have refined our humble approximation over three tries since. I present to you: Lauren and Dave’s deep-dish St. Louis focaccia by way of Chef Ted of St. John. Hearty. Delicious. Bring a hunk on a hike.
Parmesan cheese, optional (recipe is vegan without)
Directions:
Note: I let this bread rise three times, so go into this knowing that it’s is a time-consuming recipe, even with the speed-rise method I recommend. Mostly hands-off time, but still. In a large mixing bowl, blend the flour, salt, Italian seasoning, 2 tablespoons olive oil, and yeast. Add 1 cup of warm water and stir until combined. Add the remaining cup water, 1 tablespoon pesto, and sun-dried tomatoes. Stir the rest of this in well until the mixture resembles a shaggy ball. This takes a bit of manhandling and you could take care of this step in a Kitchenaid with the hook attachment if you’d like.
I was lazy and didn’t take a picture of this step. Shame, shame! Enjoy this map of Neverland instead (available on etsy).
Turn the dough out onto a lightly floured counter or prep board and knead for about five minutes, until the dough is smooth and uniform. You may want to have your hunky husband take care of this step as you watch him admiringly from the other side of the kitchen, what with his being all rustic and manly and kneading the dough and all. Shape the dough into a ball. You’ll be very happy with how pretty it looks at this point. I’m happy for you, too. Ted would keep a small chunk of dough from his most recent focaccia as a starter, which we have begun to do as well. This helps the dough develop a yeasty, sourdough flavor, so tear off a hunk and refrigerate for your next batch if you plan to do the same. In a large, clean, glass mixing bowl, add 1 tbsp of the olive oil and place your dough in the bowl, turning to cover with oil. Cover the bowl with plastic wrap or a kitchen towel and set aside.
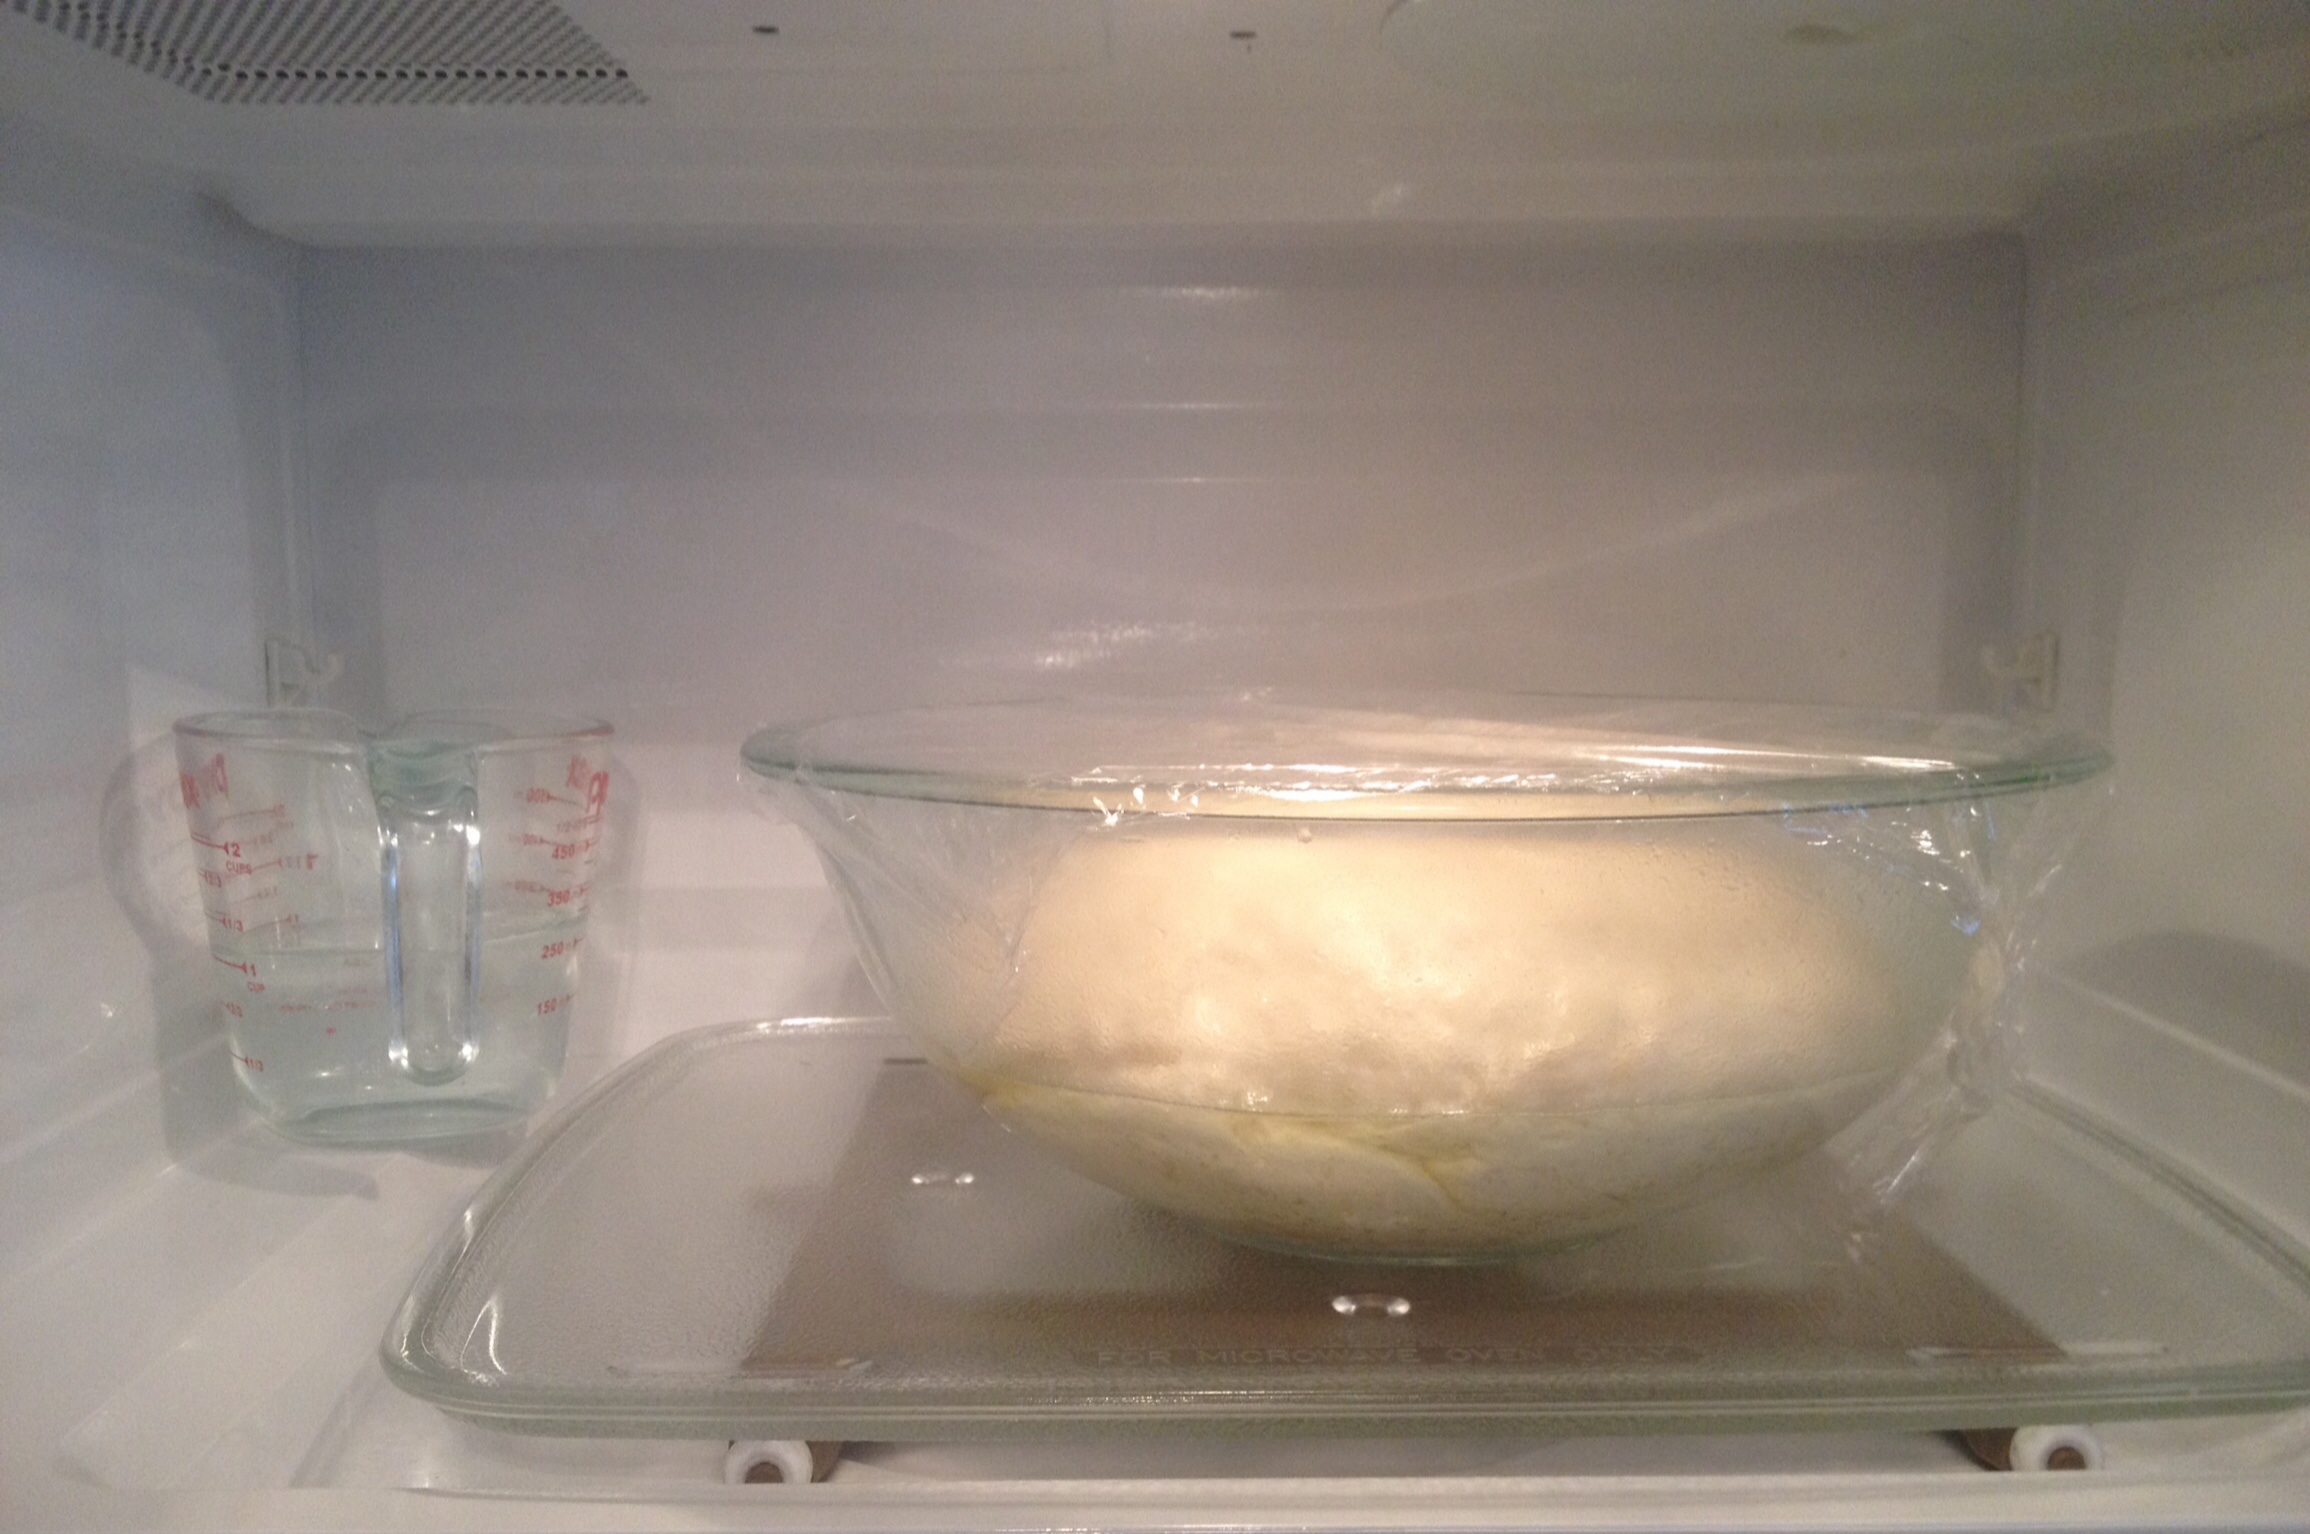
Now, for the rising process: I use a rapid-rise method for this bread, and it works wonderfully. Place a measuring cup (I use the same glass measuring cup I measured the water with) and microwave for about a minute thirty, until hot. Leave the cup in the microwave, and place your covered dough bowl in next to it. Close the microwave and let the dough rise until doubled, about 20-30 minutes. Keep an eye on this- take a picture on your phone for reference if you want to compare size. After the dough has risen, punch it down with the backs of your hands until the built-up gas has been released, then fold over itself, coating with the oil in the bowl, and cover again with the plastic wrap (I had to reach out to an expert baker friend from high school on this step via Facebook; I ❤ social networking). Let the dough rise a second time, punch down a second time, and let the dough rise a third and final time. Whew. This will take an hour to an hour and a half total. You will be handsomely rewarded for your patience, I promise.
doubling
Now! Preheat your oven to 425. Add 1 tablespoon olive oil to a cast iron pan, coating the bottom and sides. Remove the dough bowl from the microwave, punching down the dough a final time. Spread the dough out evenly in the pan with your fingers. Don’t you feel homey and capable? You should. Poke a few holes in the top of the dough, spread the top with the remaining 1 tablespoon pesto, and sprinkle with Parmesan, if you’d like.
Bake for 25 minutes on the middle rack of your oven, turning once. THIS STUFF IS DELICIOUS. We cut it into squares because we eat too much at a time otherwise but slices work, too. Top with a mix of hearty vegetables, or serve with marinara, meat sauce, or soup. Or just eat it plain and dream of the islands as you enjoy your lovely creation by the fistful. Così buono!
Sometimes you just need an easy snack. Something nutritious and fast that you can have around for a while or feed a crowd with. My answer? Hummus. Friends coming over on short notice and you don’t know what to serve? A hummus and veggie tray. Have kids? Want to make lunches with minimal ingredients so you’re not cooking all week? Consider hummus sandwiches, pitas, or snack packs. Need a healthy afternoon pick-me-up at work? Hummus and chips. You see where I’m going with this. I mean, really- throw all ingredients into a blender. Blend. Serve. Who doesn’t love a recipe like that?
2 cans reduced-sodium garbanzo beans, drained with liquid reserved
1 cup tahini
1/2 cup olive oil
juice of 2 lemons
1 tbsp cumin
1 tbsp paprika or smoked paprika
2 tsp crushed garlic
roasted garlic cloves, optional
kosher salt, to taste
freshly ground black pepper, to taste
Directions:
Place all ingredients in a large blender or food processor bowl; you can halve this recipe easily. Blend, pouring in the reserved liquid from the garbanzos until the hummus is as smooth as you’d like (you may need to scrape the bowl). Taste, adjust seasonings, and serve, refrigerating leftovers. Enjoy!!
For Christmas, my thoughtful and generous mother-in-law gifted us the loveliest KitchenAid stand mixer in a retro mint green hue. It is a truly beautiful piece of equipment and an object of design perfection. Opening our new mixer felt like a rite of passage into True Womanhood. Just owning the thing makes me feel like a domestic goddess and I’m pretty sure it’s made me a better wife. Ha!
In my slightly melodramatic, tradition-loving eyes, when one comes to own a KitchenAid, one is inducted into a time-honored order of serious home cooks and bakers. I really feel the blessings of a million lovingly-made birthday cakes and doting grandmothers enveloping my kitchen, and I love them all.
I’m now one degree of separation away from Julia Child, right? here’s her mixer at the National Museum of American History.
It’s no small surprise that after gazing longingly at the mixer for a few weeks during an especially busy holiday season, as it radiated the mint green glow of graceful experience from its shelf, I launched myself into a series of attempts to make Womanly Things with it. Yesterday’s crack at gender inequality yielded some of the softest, most buttery and delicious biscuits I’ve ever tasted… and I’d made them. WHOA. My gain is your gain! Behold….. buttermilk biscuits!
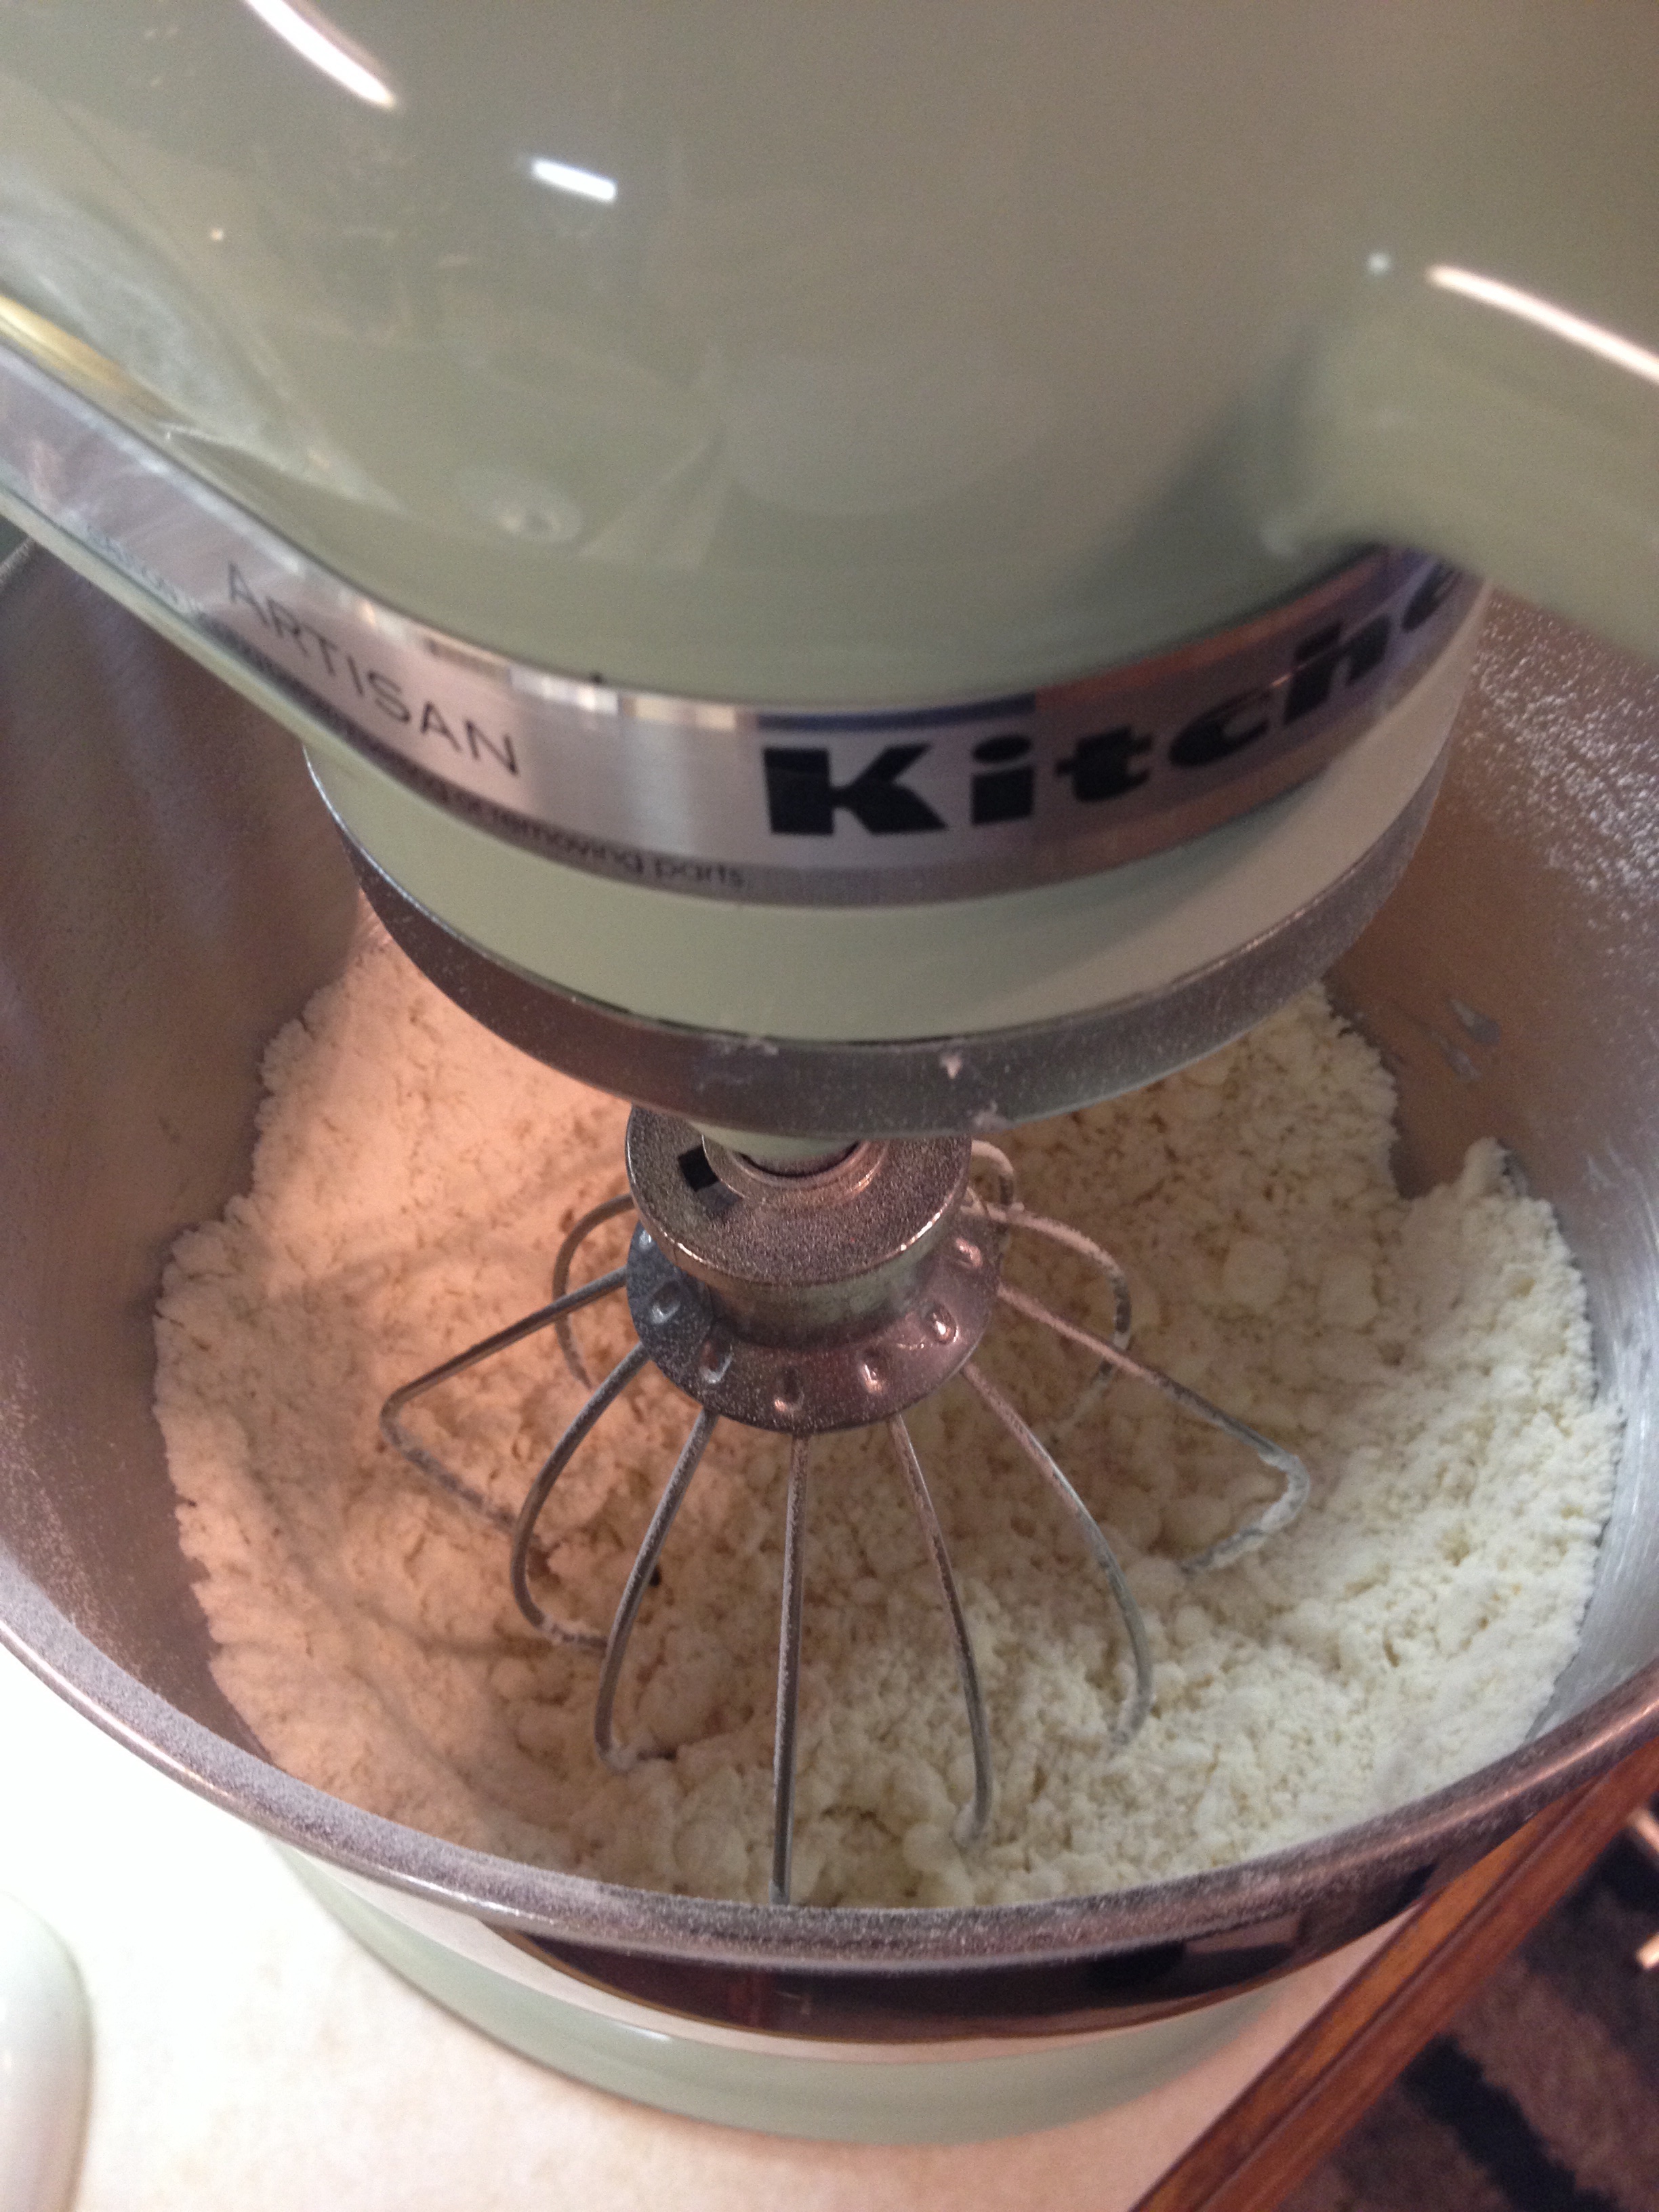
Set up your stand mixer. Dust off the top. Pat it affectionately. Pre-heat your oven to 425 and grease a baking sheet. Add the flour, sugar, salt, and baking powder to the bowl and mix at medium speed (I used setting 4) with the whisk attachment. With the whisk attachment still in use and the motor running, add butter squares and allow to mix until the crumbs resemble cornmeal. This will take 3-5 minutes, so be patient- it’s still faster than cutting in butter with a pastry cutter and will be much more even.
Butter should mix in like this
Switch out the whisk for the dough hook attachment and turn speed back up to medium. In three additions, pour in the buttermilk, allowing the dough to absorb it between each pour. Let the dough hook mix it all up until the dough hangs on the hook in a ball, about another minute. Don’t over mix.
dough on hook
Lightly flour your hands, a rolling pin, and your rolling surface and plop the dough down. I really dislike the thought of rolling food out on a counter, so I use a flat, heavy, oversized cutting board for working and rolling dough. So there’s that. Pat the dough into a rough ball and begin rolling out in all directions, keeping the rolled surface level. I rolled my biscuits out to a 1/2 inch, but feel free to roll to a 3/4 inch or 1 inch height for taller biscuits, you showy thing, you. Cut out using a biscuit cutter or, as suggested in the original recipe, the top of a cocktail shaker! That worked perfectly for me- who knew?!
two uses- fabulous!
Cut all of the biscuits you can, and re-roll the dough, re-cutting as needed. This recipe yielded eleven biscuits for me, all of which were eaten same-day. Place the biscuits on your prepped baking sheet or, alternatively, in a cake pan or cast iron skillet for fluffy, pull-apart edges. Bake for 15 minutes, turning the baking sheet once. Voila! You’ve rocketed into the floury stratosphere of People Who Can Make Biscuits! Next time, I’m adding more sugar and using for strawberry-rhubarb shortcakes… stay tuned!
who had the best helpers in the world?! scissors, spoon, and all.