Momofuku’s Pork Buns

Buns. Bao. Pillowy, chewy, savory steamed buns stuffed with decadent pork belly, spicy sriracha, and bright, contrasting cucumber. Chef David Chang, the Korean-American, French-trained creator of legendary New York noodle bar and ramen heaven, Momofuku, rocketed pork buns into their sweet-salty limelight when he added his often imitated version to the Momofuku menu in 2004. Chang’s Momofuku is largely credited for the ramen craze and his signature pork buns have been equally influential.

momo

say this ten times fast in front of your mother

I like David Chang. He’s smart and talented and somehow an “everyman” but incredibly special at the same time. His Instagram makes my mouth water and he designed the Momofuku logo in part as a tribute to Eat a Peach. Which makes him fine by me. There are homages to Chang’s tasty buns (heh, heh, heh) everywhere, even in anti-coastal St. Louis, so the pork bun trend is established and legit. Let’s make some, mmkay?!

If you have time to marinate, roast, and chill the pork and to make the buns, which rise three times, they’re simple. You just need time. Eh, maybe quite a bit of time. Allow for a few hours of rising and prep time for the buns and a possible overnight marinating and chilling of the pork. These are more of an appetizer when made with pork belly since it’s so rich, so you can either be hardcore like the Cruses and eat these as a straight-up meal (I ain’t never scared), substitute a leaner cut of pork, or serve as an app. Glaze and grill tofu or stuff with kimchi and cucumbers for a vegan version.

MOMOFUKU’S PORK BUNS

Adpated from David Chang’s Momofuku Cookbook and Food 52

Makes 25 buns

Vanity Fair on the yin and yang of David Chang: His achievements notwithstanding, he is constantly haunted by feelings that he is out of his depth, even in the kitchen. He ascribes this to han, a uniquely Korean form of angst that manifests itself as both a resigned acceptance that life is difficult and a grim determination to struggle through this difficulty.

Ingredients:

For the pork and quick-pickled cucumbers:

  • 4lbs pork belly
  • 6 tbsp + 1 tbsp sugar
  • 6 tbsp kosher + 1 tsp salt
  • 2 cucumbers, cut into 1/8 inch slices

For the buns:

  • 2 1/8 cup all-purpose flour
  • 2 tsp active dry yeast
  • 3 tbsp sugar
  • 1 1/2 tbsp nonfat dry milk powder
  • 1 1/2 tsp kosher salt
  • 1/4 tsp baking powder, rounded
  • 1/4 tsp baking soda
  • 1/6 cup rendered pork fat, from the pork belly, at room temp
  • canola oil, for brushing
  • hoisin sauce
  • 1 bunch scallions, sliced
  • sriracha, for serving
  • prepared kimchi, for serving

Directions:

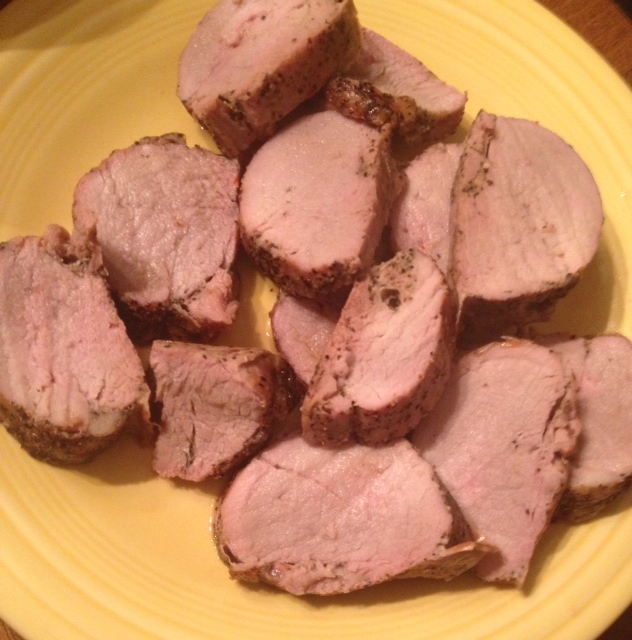
For the pork belly: mix the 6 tbsp salt and 6 tbsp sugar and rub all over the pork. Place the pork in a 9 x 13 dish or a roasting pan and cover with plastic wrap; refrigerate for at least 6 hours or overnight. When the pork is cured, pour off any liquid from the baking dish and heat your oven to a blazing 450. Roast the pork for one hour, uncovered, basting halfway through. Lower the oven temp to 250 and roast the pork for an additional 1 hour and 15 minutes. Remove the pork to a plate to cool and pour off some rendered fat to reserve for the bun dough (mmm. pork fat). Wrap with foil or plastic wrap and chill the pork until it’s cool enough to cut- we cooked the pork the day before we made the buns to allow for ample roasting and chilling time, which I highly recommend. Once chilled, the pork will slice and dice nicely. When you’re ready to eat, slice the pork into 2″ x 1/2″ slices and warm in a pan on the stove or microwave.

ch-ch-changes

ch-ch-changes

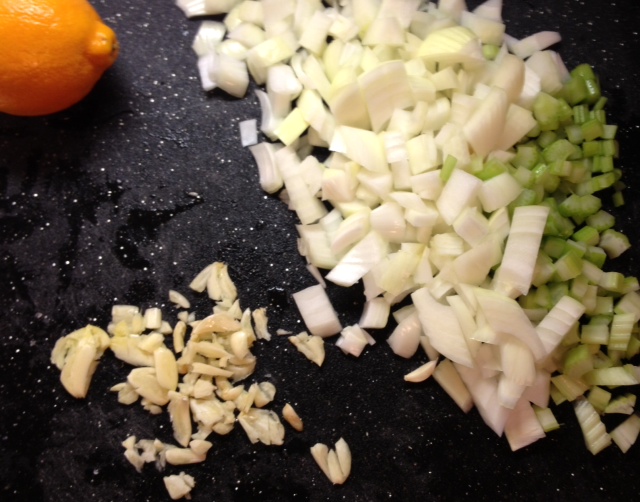
For the cucumbers: slice the cucumbers into 1/8″ thick rounds. I decoratively peeled mine with a zester because I’m fancy. Toss with 1 tbsp sugar and 1 tsp kosher salt. Let sit for 10 minutes, then cover and refrigerate until ready to use. So easy! Look at you, you’ve pickled something! So capable, you are.

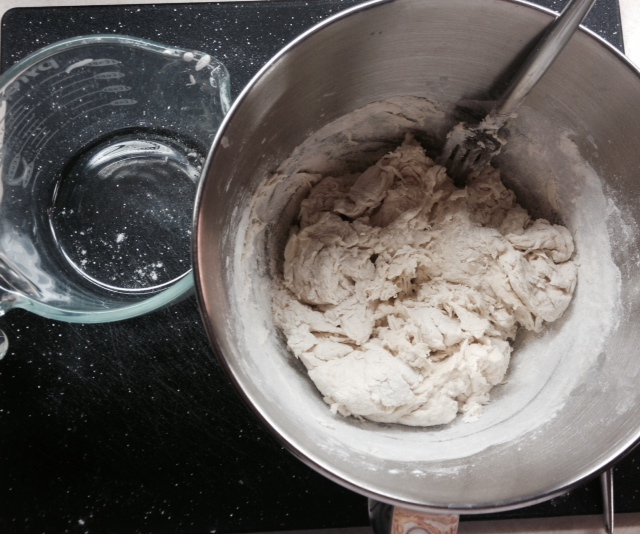
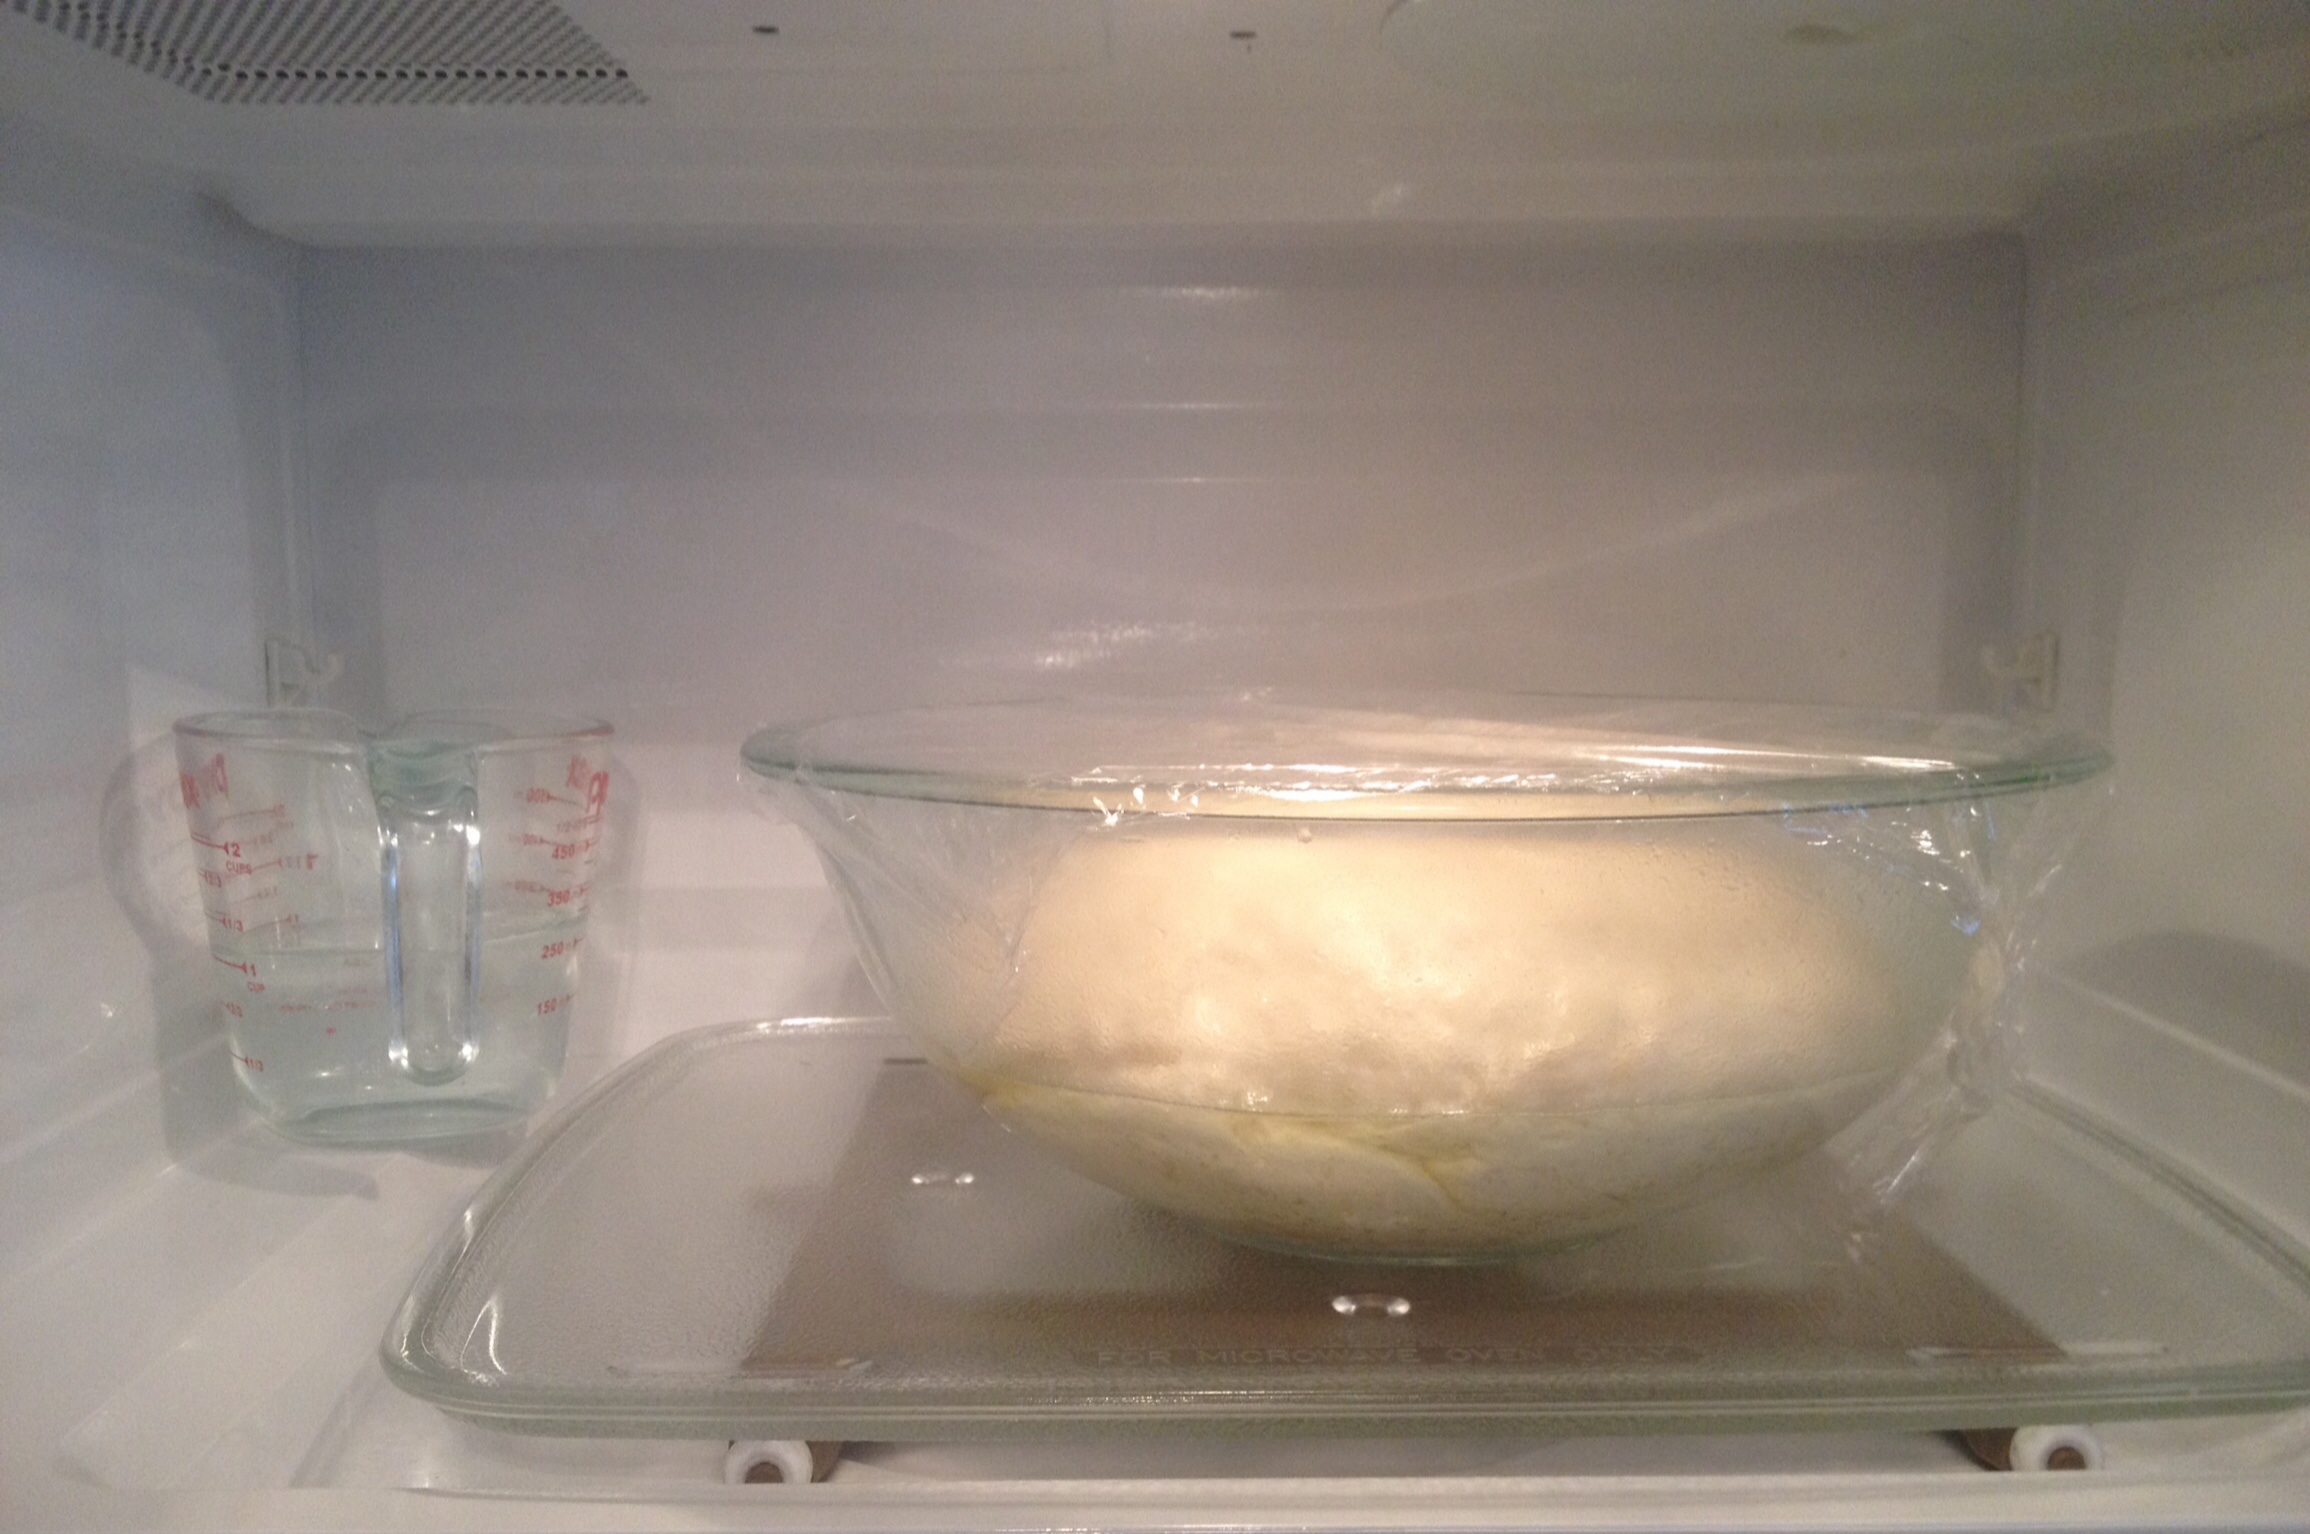
For the buns: Add the yeast and 3/4 cup warm water to a the bowl of a stand mixer fitted with a dough hook. Add the flour, sugar, dry milk powder, salt, baking powder, baking soda, and rendered fat. Turn the mixer on its lowest setting (I used “stir”) and let dough mix for 8 minutes, until it climbs the hook and forms a ball. Lightly oil a large mixing bowl and plop the dough ball in it; cover with plastic wrap and place in a warm area to rise until doubled in size. What with it finally feeling like summer, feel free to place the bowl on a windowsill for extra cozy home points.

When the dough has doubled, punch it down with the back of your hand to expel most of the air. On a clean surface- I always use a large cutting board to work with dough, makes cleanup easier- form the dough into a ball or log. Divide into 5 equal pieces and roll those into logs. Cut each logs into 5 pieces the size of ping-pong balls. Use your knife to mark off the cutting areas before you slice. I made a double batch of dough, so these are double-batch photos:

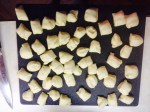
Roll the ping pongs of dough into balls and place onto a baking sheet. Cover the sheet loosely with plastic wrap and allow the balls to rise 30 minutes. While these are rising, cut out 25 4″ squares of parchment paper to steam the buns on and slice the scallions. Refrigerate sliced scallions until ready to use.

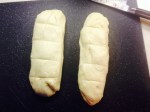
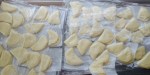
When 30 minutes has passed and the balls of dough have puffed up a bit, use a rolling pin to roll each ball into a 4″ oval. Brush each oval lightly with oil, place on a square of parchment paper, and fold in half by folding a bun over itself onto a chopstick and sliding the chopstick out. Guess what? They have to rise again. PLace the squares of parchment back on the baking sheet or maybe across a counter, making sure not to let the buns touch. Cover with plastic wrap and allow to rise 30-45 more minutes. You’re almost there! We’re almost steaming!

And now…. we steam! Which means we eat soon! Set up a bamboo steamer (or other flat steamer) on a wok or over a large saucepan filled with about an inch of water, and bring the water to a boil. Place a few buns, parchment paper included, on the steamer, making sure not to overcrowd or allow the dough to touch. Cover and steam for 10 minutes per batch, removing buns to a platter as you go.

If you haven’t done so already, slice and heat the pork belly. Stuff 2-3 pieces of pork belly into each bun, topping with cucumbers, scallions, and 1 tsp hoisin sauce. Pass kimchi and sriracha and revel in your trendy culinary accomplishment!


Baguettes! (v)

At the top of the rustic, earthy, lovely food to eat and make list- baguettes!

bags crispy

On the yeasty, satisfying, work with your hands list- baguettes!

bag and butter

Put on your berets and Breton striped shirts– let’s make baguettes!

THREE BEAUTIFUL BAGUETTES

Adapated from Food52

Ingredients:

  • 3 1/4 cups all-purpose flourbag ingreds
  • 1 1/2 cups hot water
  • 1 tsp active dry yeast
  • 2 tsp kosher salt
  • 1 /2 tbsp canola oil
  • 1/2 cup ice cubes
  • You will also need parchment paper, two kitchen towels, a rimmed baking sheet, a pair of scissors, and a cast iron or other oven-safe skillet

Directions:

This recipe is very simple. If you can knead dough (you can, the ability is buried in your genetic code) or have a stand mixer to knead dough for you, you can make these beautiful baguettes. There’s a lot of waiting involved as the dough rises; hands-on time is minimal. Baking these lovely parcels of dough is a rewarding, foolproof venture. Let’s get to it.

Faisons baguettes!

Faisons baguettes!

In a large bowl or your stand mixer’s bowl, whisk the hot water into the yeast. Let it sit for ten minutes, until foamy.

bag yeast water

When ten minutes has passed, mix the flour into the yeast and water with a fork, until a shaggy dough forms. I did this in four pour of flour for even mixing. Let this sit for 20  to allow the flour to hydrate. You’re getting the hang of this waiting stuff by now, aren’t you? Good. There’s more to come.

bag dough shaggy

After 20 minutes, add the kosher salt. Attach the bowl to the stand mixer and knead with the hook attachment for 4-5 minutes on speed 2, until the dough has climbed up the hook and is smooth and elastic. Alternatively, knead the old-fashioned way: turn dough out onto a lightly floured surface and knead for 10 minutes with the heels of your hands. “A good knead is better than an hour of psychotherapy, and it’s free.” There’s your motivation. Exorcise the demons.

bag dough salted

When your dough is smooth and shiny and elastic, oil a large glass bowl with the half tablespoon of canola. Pat the dough into a ball and place it in the bowl; cover with plastic wrap and let rise in an oven or microwave until doubled in size, about 45 minutes to an hour.

smooooth.

smooooth.

Once doubled, remove the dough and turn it out onto a lightly floured surface. Shape it into a 6×8 inch rectangle, then fold the long sides into the middle, followed by the short sides. Basically, double fold it into a little bundle. Pop the bundle back into the oiled bowl and let double again, another 45 minutes or so. I hope you have a good book to read, what with all of this sitting around, sheesh. Consider this AbeBooks list of food memoirs if you don’t. Just looking at the covers makes me hunger for a memoir marathon… I’ll need a rainy Sunday, a cozy blanket, and a LOT of supplemental food.

bag dough folded

Now we get to play with the dough! Turn the lovely bundle onto a very lightly floured surface and pinch off into three equally sized sections of dough. Roll and pinch the rounds into 14-inch logs; these will be the base shapes for your loaves.

bag dough three

Grab your rimmed baking sheet and flip it over. Arrange a piece of parchment paper 3 inches wider than the sheet and fold two pleats into it. Lightly flour the pleated parchment paper.

bag pleated parchment

Put the loaves in the spaces you’ve created on the parchment paper and pull them close together- we’re using the pleated paper to allow the loaves to rise up, not out. Roll the two kitchen towels up and place them on either side of the three loaves. Let the loaves rise until doubled. LAST TIME, I promise.

bag dough towels final

Place the cast iron skillet on the very bottom rack of your oven. Arrange a rack right above that and preheat the oven to a blazing hot 475. To make the baguettes look like baguettes, cut slices into the tops of the dough at 30 degree angles with your scissors (add that to your baking bag of tricks!). Very pretty. Flatten out the parchment paper and pop the baking sheet, still inverted, into the oven. Immediately add the 1/2 cup of ice cubes to the cast iron skillet and close the oven door. The ice cubes will sizzle away and release steam, producing a crisp crust. Bake for 20 minutes, until a deep brown. Let cool and serve! They will be crispy on the outside and chewy on the inside. Slather with butter and kick back. Bon appétit.

bags complete cooling


Heidi Swanson’s Broccoli Gribiche and My Coconut Kitchen Giveaway Winner! (veg, gf)

First things first: thank you to everyone who entered last week’s giveaway. I really enjoyed your responses- what healthy, creative people you are! To impartially choose a winner, I used the super-technical method of writing names on slips of paper and having a coworker choose one before lunch. All documented on high-quality iPhone video.

Rrrrrrroll ’em!

Congratulations Diana, winner of the My Coconut Kitchen coconut butter sampler pack! I hope you enjoy the sumptuous spreads as much as I do- let us all know how you use them.  Thank you to My Coconut Kitchen for the prize- be sure to check out Angie’s delicious inventory!

congrats

This week, I was looking for a meatless recipe with simple, clean flavors  that would fill me up, create leftovers, and be relatively simple to prepare. I was short on time and motivation and long on hunger, so who did I turn to? Heidi Swanson, author of Super Natural Every Day, a wonderful cookbook given to me by a wonderful aunt. My last Heidi Swanson post brought us another delicious meatless dinner- white beans with cabbage. Heidi’s broccoli gribiche recipe is listed in Super Natural Every Day under “lunch” and would be a showstopper at a picnic or potluck. I know it was a big hit at my one-woman potluck. Here it is! Broccoli gribiche.

gribiche done

BROCCOLI GRIBICHE

Adapted from Heidi Swanson

Ingredients:

  • 1 1/2 lbs fingerling potatoes
  • 1 large head broccoli, florets chopped into bite-sized pieces and some stem chopped
  • 2 tbsp + 1/4 cup olive oil (healthy fat!)
  • kosher salt
  • 4 hardboiled eggs, 1 cooked yolk set aside
  • 1 tsp Dijon mustard
  • 2 tbsp red wine vinegar
  • 2 shallots, finely diced
  • 1 tbsp capers, chopped
  • 2 tbsp parsley, chopped
  • 1 tbsp fresh or 1 tsp dried tarragon
  • 1 tbsp fresh or 1 tsp dried chives

Directions:

Preheat your oven to 400 degrees and arrange two racks in the middle and top of the oven. Wash the potatoes and chop any potatoes larger than your thumb in half. Do not chop your thumb in half, only thumb-sized potatoes. Toss the potatoes and any thumb bits with one tablespoon of the olive oil and a large pinch of kosher salt in a large bowl; turn the potatoes out into a single layer on a baking sheet and roast on the middle oven rack for the first 15 of 30 minutes. Set the bowl aside.

While the potatoes cook, hard boil your eggs. You can find a foolproof allez! gourmet hard-boiling method here if you need it- super, super easy. While the eggs cook, wash and chop your broccoli and toss with another tablespoon of olive oil and another pinch of salt in the large bowl. Once the potatoes have cooked 15 minutes, stir the potatoes, turn the broccoli out onto a separate baking sheet and place the broccoli on the top rack of the oven, roasting the potatoes and broccoli another 15 minutes. You can set both baking sheets aside when the roasted veggies are done.

potatoes and broccoli

Back to the eggs: let your hardboiled eggs cool in ice water for speedy cooling and to prevent rings around the yolks. Peel one, remove its yolk, and mash that yolk in the trusty, large bowl you used for the potatoes and broccoli. I’m saving you dirty dishes here. My husband would be proud. Verrry sloooowly whisk the 1/4 cup olive oil into the mashed egg yolk, emulsifying the mixture. It will be a lovely, velvety, glossy yellow.

dressing emulsify

a!g action shot! bam! pow!

Whisk in the mustard and then the vinegar. Add the shallots, capers, and herbs, mixing the gribiche well. Chop the remaining 3 1/2 eggs and gently fold them into the mixture.

dressing shallots

Now for the fun part- combine the potatoes and broccoli in an an even larger bowl and add the dressing, gently tossing everything to coat. Serve. This stuff is seriously delicious, reheats very well, and can be served cold or at room temp. The flavors of the dressing were even better the next day, having had some time to mix and mingle overnight. Cheeky devils. I paired mine with Trader Joe’s new cruciferous crunch mix, braised in olive oil with a bit of red wine vinegar. Enjoy!

dinnah is served

dinnah is served

Harkening back to March of last year, here’s an allez! gourmet recipe for a classic Spanish potato salad, Ensaladilla Rusa.


Michael Pollan, Saturated Fat, and Braised Fennel (veg, gf)

Fennel. So lovely, so fragrant, so exotic-looking when wedged between carrots and celery in the produce section, like a ballerina on a bus. It stumps check-out clerks and home cooks, causing both to miss out on its nutritional benefits if they do not know what in the heck to do with a bulb once they’ve brought it home.

feathery fronds

feathery fronds

Fennel packs vitamin C, fiber and potassium in each serving, making it a nutritional powerhouse and especially beneficial to runners and athletes recovering from hard workouts. Low in calories and incredibly flavorful, it’s a stellar addition to any home menu. All while earning you “cook unafraid of unusual vegetable” points (score!).

fennel braised

My favorite way to prepare fennel is the simple braise outlined below; another favorite is tossing it into this A!G Provencal Fish Stew. This braise pairs well with chicken, fish, or pork, or with loads of other veggies- I’ve served it alongside roasted carrots, onions, and brussels sprouts as a hearty all-veggie dinner. Hope you enjoy! And how else have you prepared fennel?

BRAISED FENNEL

Adapted from McDaniel Nutriton

Ingredients:

  • 3 large fennel bulbs, trimmed and sliced (you can use the stalks as well)
  • 1 cup broth or 1 cup water and 1 tsp vegetable base
  • 4 tbsp butter- this sounds like a lot but bear with me
  • 3 cloves garlic, minced, or 3 tsp crushed garlic
  • 2 tbsp fennel seeds

Directions:

After prepping the fennel, this recipe is a one-step wonder. You’ll toss all of the ingredients into a saucepan and cook in just a moment. Clean your fennel bulbs and cut off a slice of the thick root end. Lob off the fronds and reserve for another use and cop the stems and root into 1-inch slices. I find it easiest to quarter the bulbs and cut from that point.

fennel ingreds

Now before you toss everything into your pan, let’s talk butter. Recent studies have shown that “bad” saturated dietary fat, if it comes from high-quality organic sources (think organic butter from grass-fed cows, grass-fed or pasture raised beef, raw cheeses, strained organic yogurt, whole organic milk, eggs form pasture-raised chickens, etc.), may not be that bad after all. Scientists and the food-minded argue that it’s the highly-processed trans fats and chemically altered saturated fats and preservatives that are killing us. A 2010 study by the American Society for Nutrition concludes that:

“A meta-analysis of prospective epidemiologic studies showed that there is no significant evidence for concluding that dietary saturated fat is associated with an increased risk of CHD (coronary heart disease) or CVD (cardiovascular disease).”

WHOA. In a recent conversation about the saturated fat vs. high-quality full-fat food debate, a friend pointed out that the food our healthier, more active, longer-living grandparents ate was full fat, was often organic before that was a “thing,” was fresh, and was more satiating due to its high fat (and fiber) content. Hmm. Very true. Our grandparents also ate more vegetables and whole grains than we do- no slabs of meat at each meal and no bags of Doritos and partially hydrogenated cheese dip. And they ate smaller portions. The argument for full-fat foods does not, by any means suggest that eating plates of hand-cured, gourmet, farm-raised bacon with six eggs and toast slathered in butter is a good for you- everything in moderation, my friend. Journalist and food activist Michael Pollan, with whom I’ve recently become obsessed, says it best:

“Eat food. Not too much. Mostly plants.”

So to celebrate that mantra and to test the new theory, which makes perfect sense in my mind, let’s eat veggies and use butter today! Back to the recipe. Add all ingredients to a deep saucepan and bring to a boil. Reduce heat, cover, and simmer for 10 minutes. Uncover and continue cooking over medium for another few minutes, until most of the cooking liquid has evaporated; don’t allow the fennel to get mushy. There you have it! Serve. What are your thoughts on the saturated fat debate? I’d love to hear your comments below!

simmering fennel


Focaccia! Deep-dish Focaccia! (v)

image

Dave and I were fortunate enough to visit the most beautiful place in the world recently: the U.S. Virgin Island of St. John. The island is 2/3 national park (whaaa!), has beaches varying from pristine white sand with aquamarine water to grassy turtle habitat to all smooth, gray rock,  it’s dotted with Dutch and Danish sugar mill ruins, and it’s crisscrossed with challenging and well-maintained hiking trails. The fact that the majority of the island is a park keeps the riff raff out (airports, huge all-inclusive resorts, restaurant chains, shopping malls) and that’s helped the wildlife, flora, coral, and sea life stay healthy and breathtaking. It’s pretty much the real-life Neverland. I know this because the people of St. John each have a glinting glimmer of Lost Boy in their eyes.

Neverland, I tell ya

Neverland, I tell ya

We fell in love the moment we arrived and swam, hiked, and ran over as much of the island as we could during our stay. We snorkeled daily, swimming with hawksbill turtles, myriad tropical fish by the school full, barracuda, rays, and even a large eagle ray. Rarely have I come back from a vacation in better shape than I left, but that was definitely the case coming home from St. John. And while the scrubby Missouri hills of home can’t compare to the vertical, emerald green volcanic mountains of STJ, I am determined to forge a hiking habit this summer, ticks be damned. Each day after hiking and swimming, we’d head to better-than-they-have-to-be food and drink spots like the Fatty Crab (order the Recession Special), Sam & Jack’s, Vie’s Snack Shack for conch fritters, Skinny Legs for burgers, live music, and shots with locals, and Asolare (go straight to the bar to meet Kim, master mixologist). I’m telling you, if you’re an outdoorsy nature lover who also enjoys outstanding and creative food, people, and drink, St. John may very well be the island for you. It certainly stole our hearts.

Outside of physical exertion and rum-swilling good times, a highlight of our trip was an incredibly romantic dinner Dave booked with Ted’s Supper Club, a well-known private chef service  on the island. We were agog watching Ted cook. A-freaking-GOG. The skilled and professional Chef Ted whipped up an unforgettable meal of salad, dumplings, scallops, fish, veggies, lava cake, and a deep-dish focaccia bread with pesto and tomatoes cooked in cast iron that held us over for days. The focaccia really made an impression on us and I vowed to make it when we got home. That was in January; we have refined our humble approximation over three tries since. I present to you: Lauren and Dave’s deep-dish St. Louis focaccia by way of Chef Ted of St. John. Hearty. Delicious. Bring a hunk on a hike.

image

DEEP-DISH FOCACCIA

Humbly and reverently adapted from Ted’s Supper Club and Italian Food Forever

Ingredients:

  • 5 cups all-purpose flour, plus more for dusting
  • 2 tbsp (3 packets) instant yeast
  • 1 tsp kosher salt
  • 1 Italian seasoning
  • 2 cups warm water
  • 2 tbsp pesto
  • 2 tbsp chopped sun-dried tomatoes
  • 4 tbsp olive oil, divided
  • Parmesan cheese, optional (recipe is vegan without)

Directions:

Note: I let this bread rise three times, so go into this knowing that it’s is a time-consuming recipe, even with the speed-rise method I recommend.  Mostly hands-off time, but still. In a large mixing bowl, blend the flour, salt, Italian seasoning, 2 tablespoons olive oil, and yeast. Add 1 cup of warm water and stir until combined. Add the remaining cup water, 1 tablespoon pesto, and sun-dried tomatoes. Stir the rest of this in well until the mixture resembles a shaggy ball. This takes a bit of manhandling and you could take care of this step in a Kitchenaid with the hook attachment if you’d like.

I was lazy and didn't take a picture of this step. Shame, shame! Enjoy this map of Neverland instead.

I was lazy and didn’t take a picture of this step. Shame, shame! Enjoy this map of Neverland instead (available on etsy).

Turn the dough out onto a lightly floured counter or prep board and knead for about five minutes, until the dough is smooth and uniform. You may want to have your hunky husband take care of this step as you watch him admiringly from the other side of the kitchen, what with his being all rustic and manly and kneading the dough and all. Shape the dough into a ball. You’ll be very happy with how pretty it looks at this point. I’m happy for you, too. Ted would keep a small chunk of dough from his most recent focaccia as a starter, which we have begun to do as well. This helps the dough develop a yeasty, sourdough flavor, so tear off a hunk and refrigerate for your next batch if you plan to do the same. In a large, clean, glass mixing bowl, add 1 tbsp of the olive oil and place your dough in the bowl, turning to cover with oil. Cover the bowl with plastic wrap or a kitchen towel and set aside.

image

Now, for the rising process: I use a rapid-rise method for this bread, and it works wonderfully. Place a measuring cup (I use the same glass measuring cup I measured the water with) and microwave for about a minute thirty, until hot. Leave the cup in the microwave, and place your covered dough bowl in next to it. Close the microwave and let the dough rise until doubled, about 20-30 minutes. Keep an eye on this- take a picture on your phone for reference if you want to compare size. After the dough has risen, punch it down with the backs of your hands until the built-up gas has been released, then fold over itself, coating with the oil in the bowl, and cover again with the plastic wrap (I had to reach out to an expert baker friend from high school on this step via Facebook; I ❤ social networking). Let the dough rise a second time, punch down a second time, and let the dough rise a third and final time. Whew. This will take an hour to an hour and a half total. You will be handsomely rewarded for your patience, I promise.

image

doubling

Now! Preheat your oven to 425. Add 1 tablespoon olive oil to a cast iron pan, coating the bottom and sides. Remove the dough bowl from the microwave, punching down the dough a final time. Spread the dough out evenly in the pan with your fingers. Don’t you feel homey and capable? You should. Poke a few holes in the top of the dough, spread the top with the remaining 1 tablespoon pesto, and sprinkle with Parmesan, if you’d like. image

Bake for 25 minutes on the middle rack of your oven, turning once. THIS STUFF IS DELICIOUS. We cut it into squares because we eat too much at a time otherwise but slices work, too. Top with a mix of hearty vegetables, or serve with marinara, meat sauce, or soup. Or just eat it plain and dream of the islands as you enjoy your lovely creation by the fistful. Così buono!


Quickie: Hard Boiled Eggs with Dukkah (veg, gf)

As I mentioned in my last post, I’m in love with the Heidi Swanson cookbook, Super Natural Every Day. This lovely little snack is straight from her book, with a Trader Joe’s-loving twist: I bought my dukkah pre-made. Sacrilege, I know! And while Heidi’s recipe for homemade dukkah is lovely, I couldn’t pass up a high-quality shortcut for $2.99.

eggs

Dukkah is an Egyptian seasoning blend made of nuts and spices, and is often mixed with oil and used as a delicioud bread dip. Heidi suggests drizzling a hard-boiled egg with a bit of olive oil and sprinkling with dukkah as a quick and flavorful snack.

dukkah

This idea has been tantalizing me for months and when I found my jar of dukkah at TJ’s, it was game on. This is much less a recipe than an idea and an inviting way to try a possibly unfamiliar spice blend. So, let’s talk hard boiled eggs and have a snack, shall we?

HARD BOILED EGGS WITH DUKKAH

Inspired by Heidi Swanson

  • pre-made dukkah, available at Trader Joe’s, or made with Heidi Swanson’s recipe
  • eggs
  • olive oil

My foolproof method for hard-boiling eggs is this: place your eggs gently into a pot and cover with cold water, bring to a boil, cover with a lid and remove from heat, allow to sit- covered- for 15 minutes. When 15 minutes is up, float the eggs in a bowl of ice water before peeling. This will prevent those icky green rings around the yolks. Peel, cut an egg in half lengthwise, drizzle with a bit of oil and sprinkle with dukkah. Delicious!

ice bath


Have Yourself a Healthy Little Christmas

Happy holidays! I hope everyone reading this is stuffed to the gills with pie and ham and eggnog and booze and sugar cookies. That’s a good way to be. Dave and I have between three and four family Christmases to attend each year and the highlight is always the food. This, for our crazy Cruse appetites, means two dinner plates each and a dessert plate, at every meal. WHOA. Hey, we love life! What can I say? A delicious practice, gorging ourselves, but fleeting and not without serious après-holiday plumping effects.

recipes

This year, Dave’s mama suggested a healthy Christmas Eve feast- novel idea! I assume some responsible families, somewhere (somewhere very far away from us, out of sight and mind) have been doing this for generations, but it was definitely a twist in our holiday routine. The menu included mashed sweet potatoes, Oaxacan eggplant spread, shrimp cocktail, quinoa salad, grilled salmon, and roasted pork tenderloin. Not a stick of butter in sight, and the meal was a huge hit! I’ve included all recipes below. What did you make? Does your family steer from the norm and go healthy during the holidays?

dinnah is served!

dinnah is served!

HEALTHY CHRISTMAS FEAST!

salmonGrilled Salmon with Herb Rub: just posted this Allez! recipe last week! Such an easy crowd pleaser.


OaxacanOaxacan Eggplant Spread: adapted from Gourmet magazine. Char eggplants and poblanos, peel, chop, and combine with white onion, cilantro, lime, and the kicker-  a habanero! Divine. This was the underdog Big Deal dish of the evening. We made it one before, in the summer- it’s really good with ice cold beer. Serve with corn tortillas or tortilla chips.


potatoesMashed Sweet Potatoes: clean, roughly chop, and boil 3-4 large sweet potatoes until tender (do not skin). Drain, return to pot, and mash with 1/2-3/4 c orange juice, 2-3 tbsp margarine, 1 tsp cinnamon, and a pinch of kosher salt. Taste and add more OJ/margarine/cinnamon/salt to taste.


quinoaQuinoa Salad with Avocado, Black Beans, Corn, and Tomatoes: adapted from MindBodyGreen. Cook and cool 1 cup quinoa according to package directions. When cool, add a whisked vinaigrette of the juice of a lime, 2 tbsp olive oil, and 1/4 tsp each salt and pepper. Add a handful chopped cilantro, 1 cup corn, a rinsed can of black beans, 10-12 halved cherry tomatoes, and a diced avocado. Adjust seasoning to taste.


tenderloinPork Tenderloin: we roasted a pre-seasoned pork tenderloin from the store, but here’s an Allez! rosemary pork tenderloin recipe from February, 2012.


Shrimp Cocktail: who has two thumbs and forgot a close-up? This girl! But no biggie- just buy shrimp and serve with cocktail sauce. BOOM.

I hope the holidays were wonderful for you and that 2014 is full of joy and success. And, as always, thank you for reading!

Cruses

Merry Christmas!


Provençal Fish Soup (pes, gf)

The change of seasons must be triggering my cravings. I don’t know what it is about summer-to-fall, but the transition puts me into cooking and Pinterest overdrive! Two nights ago, I stopped at the grocery store on a mission: TO MAKE FISH SOUP. I had to have fish soup! A warming yet light, garlicky, fresh and fragrant tomato-based fish soup. IMMEDIATELY. The drive was so intense that I completely neglected to pick up the other items on my grocery list!

feeling rustic?

feeling rustic?

The soupy cravings I had were a perfect compass to a healthy and sustaining meal. We tend to eat large portions, and this recipe fed Dave and me for three meals straight. Please, if you’re a fish lover, give it a shot! It’s a boulliabaise-y dream come true. Would be even more delectable with a crusty loaf of French bread, and shrimp could be left out for those avoiding shellfish. Bonus: I felt quite rustic and womanly while making it. Ha! Bon appétit!

I love little fishes, don't you?

I love little fishes, don’t you?

PROVENCAL FISH SOUP

Adapted from Emeril Lagasse, bless his soul

Ingredients:

  • 1 1/2 lbs cod or  halibut, chopped into 1-inch chunks
  • 1 lb shrimp, peeled and deveined
  • 3 tbsp olive oil
  • 1 large onion, chopped
  • 2-3 stalks celery, chopped
  • 10 cloves garlic, smashed (trust me on this)
  • 1/3 c white wine
  • 2 tbsp tomato paste
  • 1 bottle (16 oz) clam juice
  • 6 c vegetable broth, or 6 c water and 5 tsp vegetable base
  • pinch crushed red pepper
  • 1 orange, juiced and rind reserved
  • 2 fennel bulbs, cut in half width-wise and chopped
  • 2 yellow potatoes, diced
  • 1 large tomato, seeded and chopped
  • salt & cracked black pepper
  • 2 tbsp fresh parsley, chopped

Directions:

In a large stockpot, heat the olive oil over medium heat. Add the onion, celery, and garlic, cooking until tender.

mmm, aromatics

mmm, aromatics

Add the white wine, tomato paste, crushed red pepper, orange juice, clam juice, and vegetable broth. Cut a few inch-long strips off of the orange peel, and toss into the pot. Bring this stock to a boil and reduce by one-third. This took me about 10 minutes; feel free to taste-test to gauge your reduction time or cook at a lower heat if you’re blessed with this elusive “patience” I keep hearing about.  Sounds interesting. I haven’t had time to check it out.

nourishing goodness

nourishing goodness

While the stock is reducing, finish chopping your tomato, fennel, and potatoes. Add these veggies when the stock has reduced, and cook at a simmer, uncovered, for 15 additional minutes. Salt and pepper your fish and cut into chunks. When the potatoes and fennel have cooked for 15 minutes, add the fish chunks, shrimp, and parsley. Cook for 5 minutes at medium heat, stirring to make sure the fish is well-immersed in the hot broth. Do a taste test and add salt and pepper, if you like (I added lotsa black pepper). Ladle into bowls and enjoy! And enjoy again!